Getting Started with Microsoft Forms: Part 3

Read the other posts in our Getting Started with Microsoft Forms series below:
Welcome to the third and final part of this Microsoft Forms series. In the last two articles we’ve taken a look into the overall features, but this time, we’re tackling the quiz section of Microsoft Forms. This is probably the feature schools are aware of, but the rest of us not too much.
The starting point is the same as always: you head to the Forms website and in the “My Forms” section click on New Quiz.
In the “Untitled quiz” section, you start and define what your quiz is all about. You can add an additional description and a picture. For this article, we’ve created a quiz about Microsoft Forms. Makes sense, right?

Next, you should add some questions to your quiz. There’s no right or wrong way to go about the overall length, but keep in mind that a quiz with 50 questions is a little excessive.
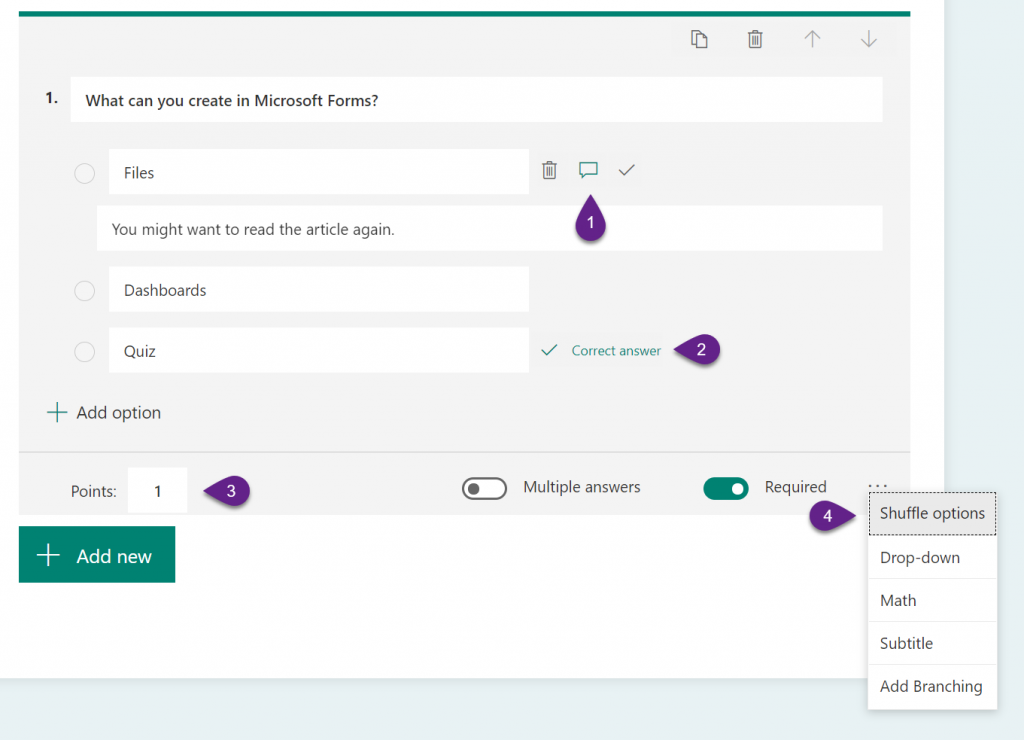
We are starting with a simple choice question. In the picture below you’ll find the details on the options for grading the quiz question.
- This is an answer you can predefine to let your audience know what to do in case they choose that answer. It’s like a recommendation to help not choose this answer again.
- Each line shows these options. The checkmark indicates that you select that answer as the correct one. The result is shown in the third selection.
- You can define how many points this question gets.
- Here are some additional options like shuffle, changing the options to a dropdown, math to make calculations, and more.
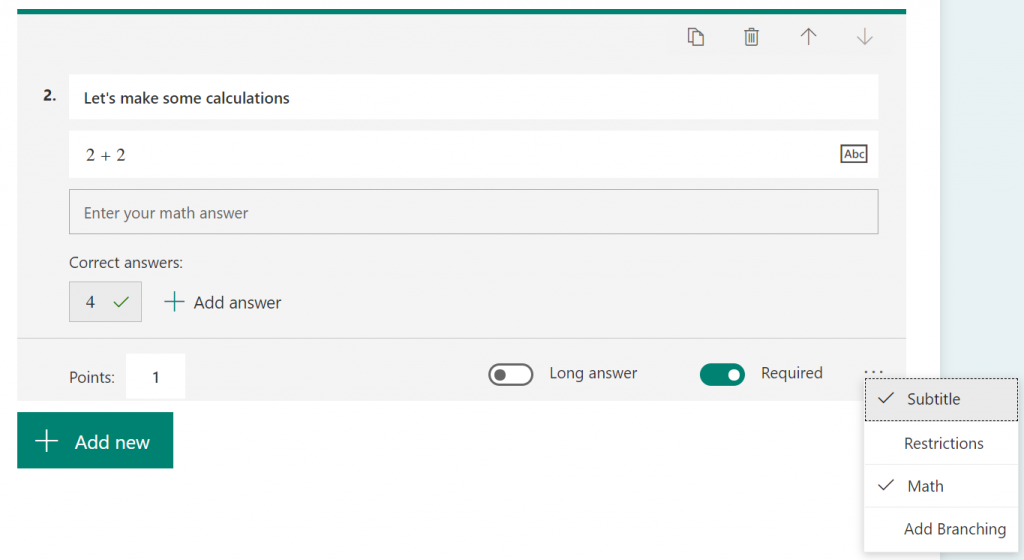
Though the need for the fourth question is unlikely, you do have the option to conduct some quite difficult math quizzes. Obviously the following equation isn’t that crazy, but you can see what’s possible.
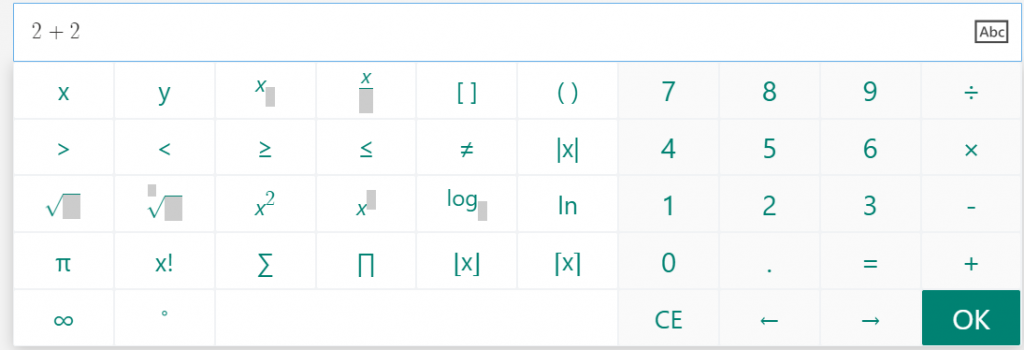
You simply just select “Math” from the advanced options, and you have access to a bunch of different question types to choose from. This is a simple Text question. Here’s a little idea of what you can do:
Some questions are not able to answer themselves, like Rating or Date. That means you must rate the answers manually. A little workaround for the date is the Text question. You can tweak that into a valid option for you. You also get the overall points of your quiz summarized behind its title quiz.
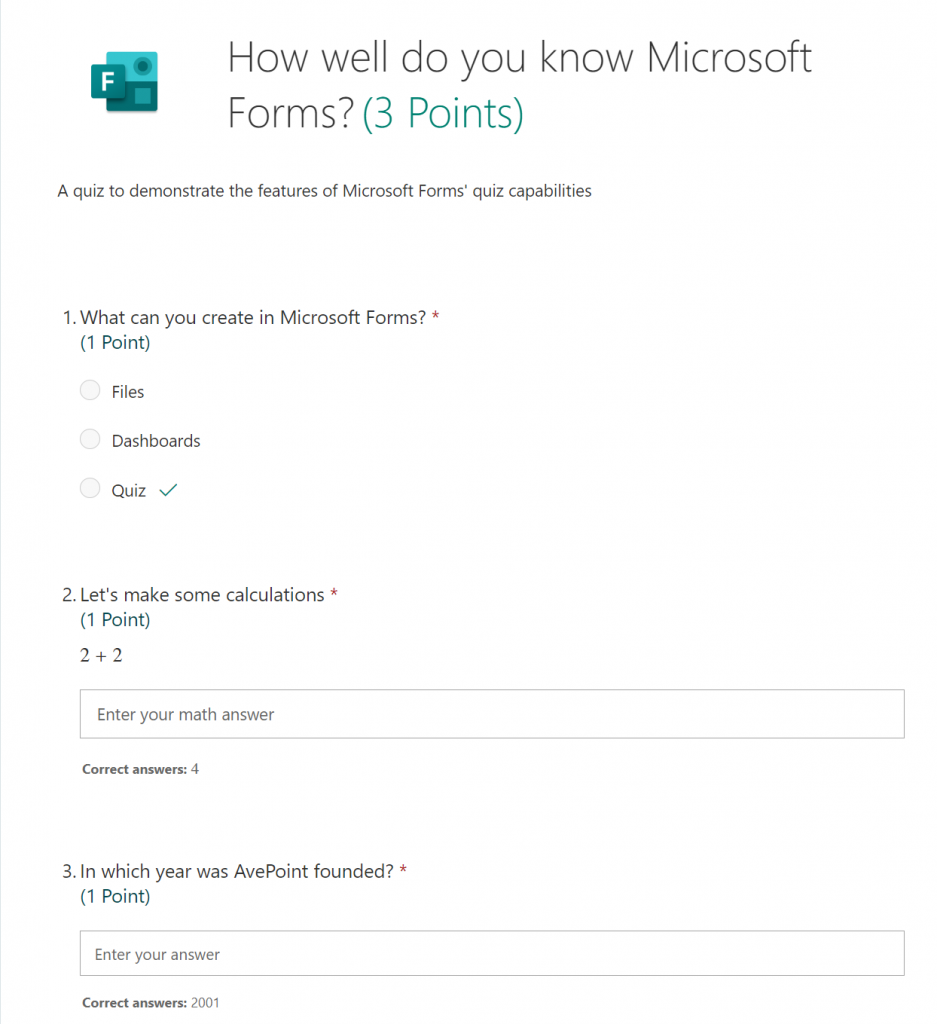
Let’s fill in the quiz and see what happens.
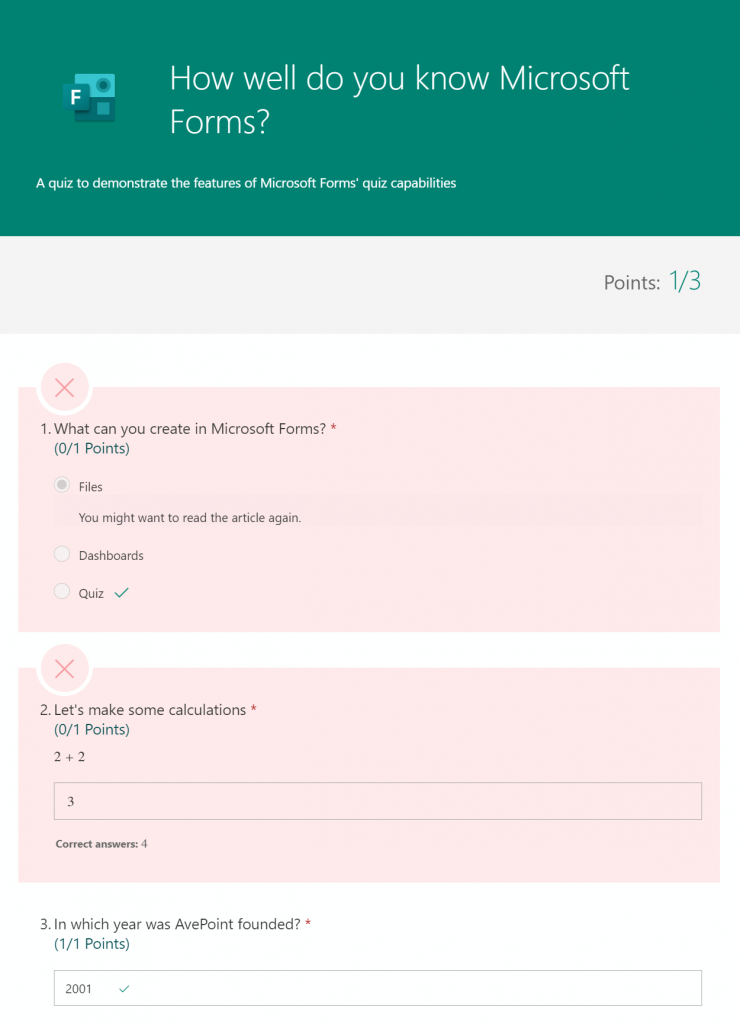
With the answered questions above, you see the result perfectly. The recommendation in Question 1 is shown as well as the correct answer. In Question 2 you also see the correct result, and Question 3 has a checkmark to identify that it’s correct (along with the “1/1 Points”). As a result, in this quiz I got 1/3 Points.
Also, make sure you check your settings before sending out the link to the quiz. There’s an important setting in addition to the normal Forms settings.
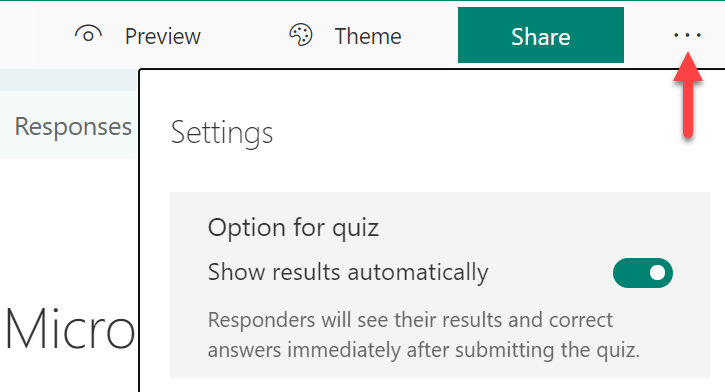
To “show the results automatically” is activated by default, but in case you have questions you have to check manually, you might want to disable this option.
When you’re ready, you can click on the Responses Tab and either review the answers or post the scores.
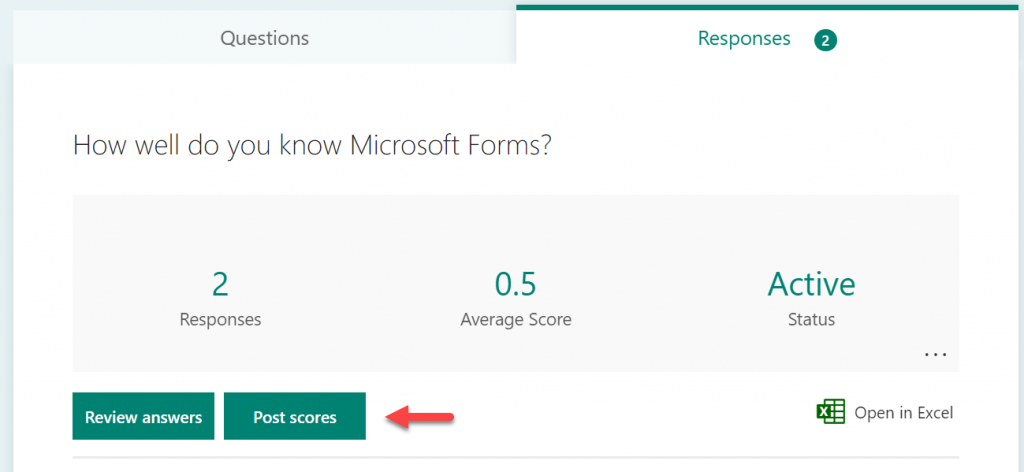
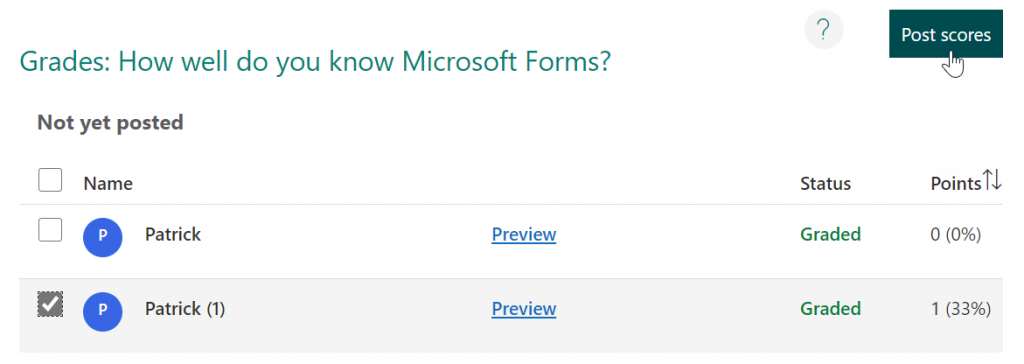
From there you can select individual responses you want to post and preview them or “select all” and post the scores.
Overall, the capabilities for such a quiz are great, and for my use cases they’ve always been sufficient. Sure, I’m not a teacher and most likely don’t use it as was originally intended, but to use it in user adoption workshops it has always been fun. After a session I’d often add a Rating question at the end asking “How much did you enjoy this quiz?” and would manually rate it 100 points so everybody felt accomplished afterward ?
In any case, I hope you’ve enjoyed this three-part series on Microsoft Forms. Thank you for your time!


