Microsoft Teams is a great platform to facilitate virtual meetings, especially now in the era of hybrid work. However, when it comes to needing to discuss various topics in a large group, it can be hard to recreate that “breaking up into groups and reconvening after 15 minutes” convenience that comes with in-person meetings. To address this very challenge, Microsoft recently added a new feature to Microsoft Teams called “breakout rooms.”
What are Microsoft Teams breakout rooms?
This feature provides a sub-meeting space within the main meeting for users to split off and discuss a single topic, have brainstorming sessions, and so on. This will be beneficial to business departments with many members and sub-groups, as well as educators looking for a way to divide their students into smaller groups for discussion and activities.
Creating Breakout Rooms
Currently, this feature is only available in Microsoft Teams for desktop, and only the meeting organizer can create breakout rooms. They can be created either before or during the meeting, but the process is very much the same regardless.
Before the Meeting
Right-click on the meeting invite in the Teams calendar and click on “Edit.” Upon clicking, you will be able to configure your meeting with the “Breakout rooms” tab.
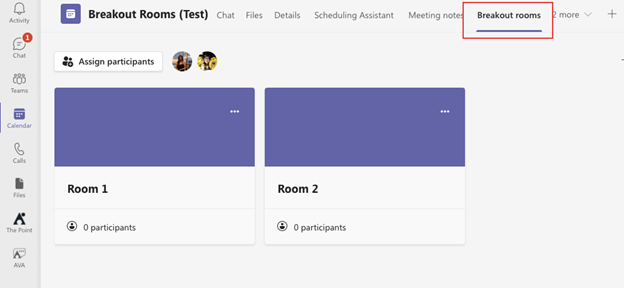
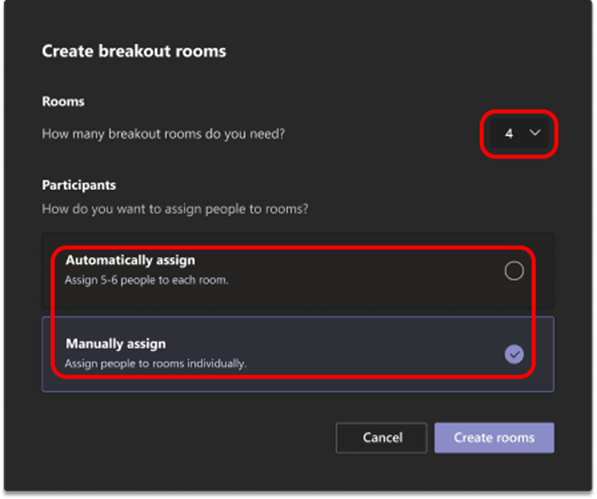
From here, you can start configuring your breakout rooms and assign participants ahead of the meeting. You can create up to 50 breakout rooms and either automatically or manually assign participants to each room.
During the Meeting
There is another way for you to configure breakout rooms. After the meeting has been started, the organizer can click on the icon below in the meetings menu to split participants up into different room there and then.
![]()
Assigning Participants
Once rooms are created, you can start assigning participants. Teams can automatically assign participants evenly to each room, but there’s also the option to manually assign participants if specific groups are needed. Note that once you choose to manually assign people, you’ll no longer be able to select the automatic option.
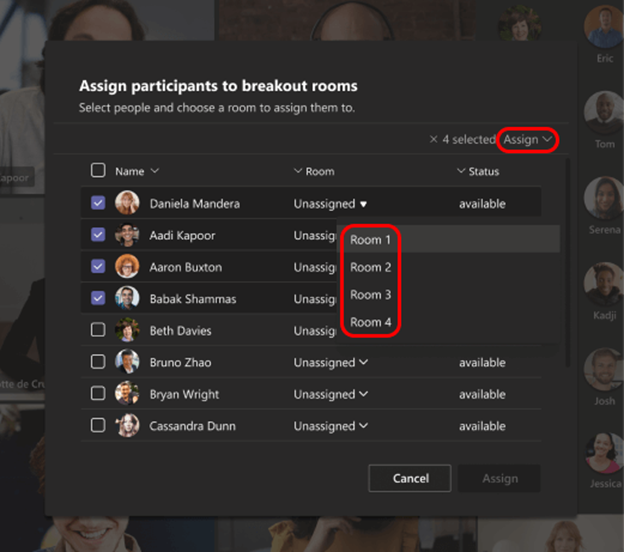
When you choose to manually assign participants, you can click on the “Assign participants” button and you will be able to see a full list of meeting attendees. You can assign them one by one or tick the checkbox beside each name and assign them at once.
Renaming Breakout Rooms
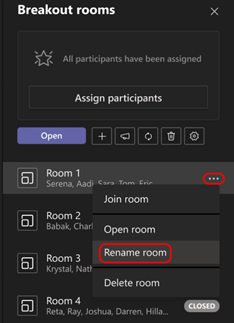
You can rename the breakout rooms to easily recognize them. To proceed, click on the ellipsis icon beside the room name and click “Rename room.”
Configuring More Breakout Room Settings
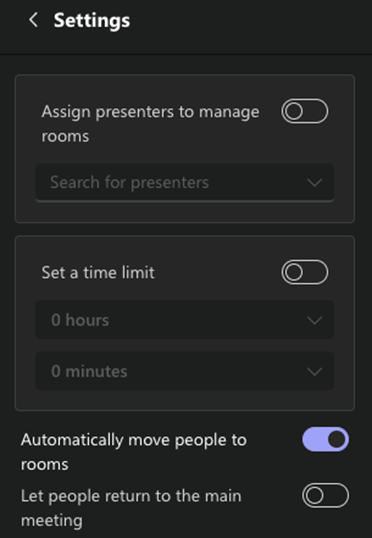
If you click on the breakout rooms icon and go “Settings” you’ll see more options. Here you can assign presenters to manage each room, set a time limit for the breakout rooms, and determine whether participants can go back to the main meeting anytime or only once that time limit has elapsed.
Starting and Opening the Breakout Rooms
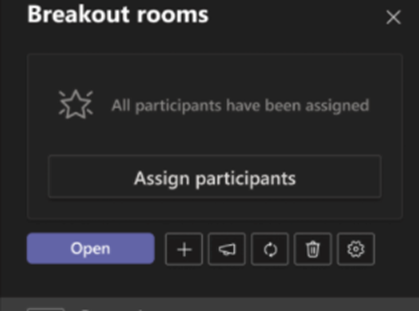
Once all configurations have been done, you can now begin using the breakout rooms. When you click on the Open button, participants will be automatically sent to their assigned rooms.
Navigating breakout rooms during the meeting
As the meeting organizer, you can join any of the breakout sessions; just choose the room and click “Join room.”
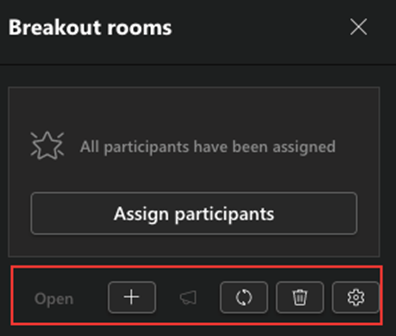
Also, you can cascade an announcement to all the rooms, such as telling them the remaining time of the session. Click on the megaphone icon, type in your announcement, and the message will pop up at the top of each room for all participants to see.
Recreate all rooms by clicking the refresh arrow button. This will bring up a warning that all rooms will be deleted upon recreation. If you simply want to delete all rooms, you can click on the trash bin icon.
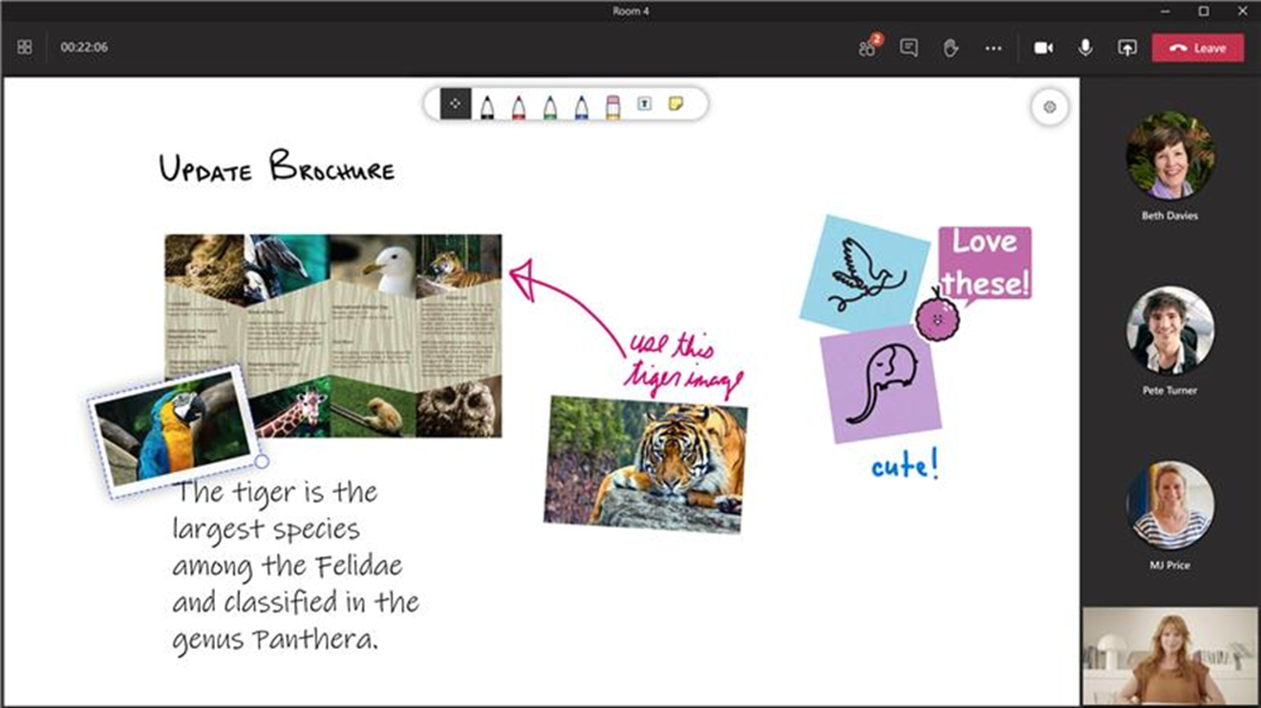
Just like a regular Teams meeting, breakout room participants will be able to access features such as Whiteboard and Together mode that make meetings more intuitive and effective.
Closing the Rooms and Ending the Meeting
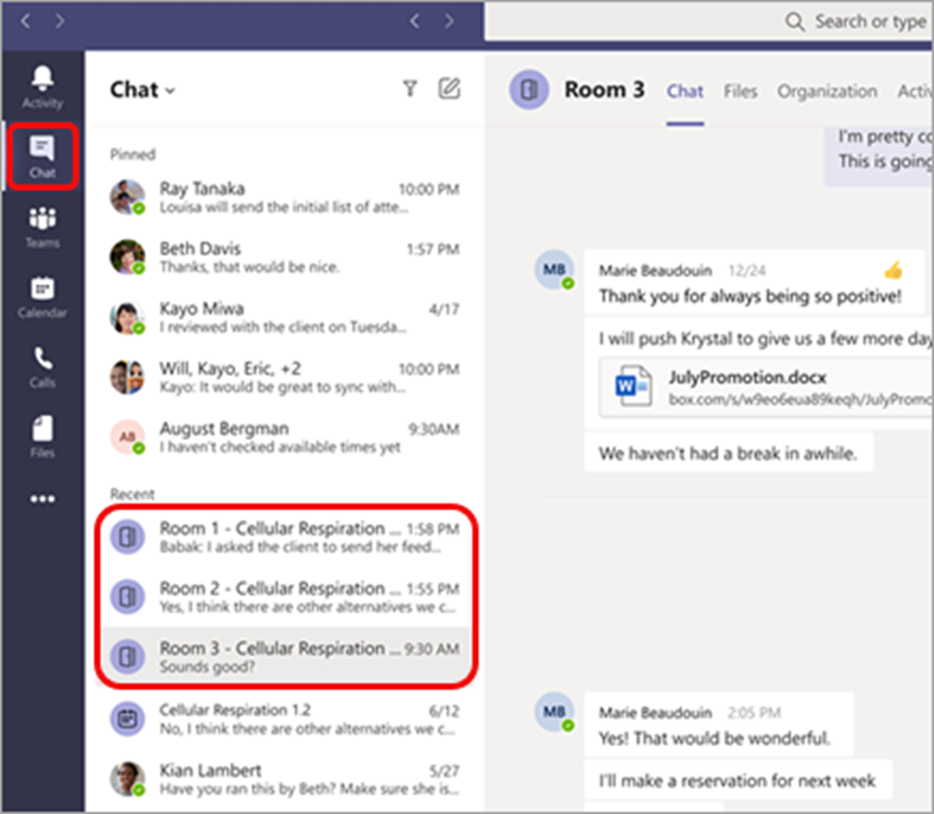
You have the option to close rooms one by one or close them all at once. Select “Close rooms” to collectively close them or close each room manually that has an “Open” status. All the chats and files of each room will be available in the chat tab of Microsoft Teams, so participants can continue to discuss and access shared files even after the meeting is over.
For in-depth feature details, reference this official Microsoft documentation via this link. Microsoft Teams breakout rooms will surely elevate the meeting experience of your participants and make the sessions more interactive and productive than ever.

