How to Boost Collaboration Using Viva Connections for Microsoft Teams Desktop

Microsoft Teams is one of the most effective collaboration platforms being used today. It’s a great tool not only by its features and functionality, but also for how it can be integrated with most Microsoft solutions, making it more dynamic and efficient. You can do things like:
- Access your OneDrive files right from a Teams channel (allowing you to edit, make changes, and comment without leaving the application)
- Directly share files and attachments from Outlook to Teams and vice versa
- Modify, create, and join Teams meetings from the Outlook app
Aside from these, there are also Microsoft Teams connections you can make with SharePoint, the Power Platform, and more. In this post, we’ll show you how you can add connections between Viva Connections and Teams, and how it can create a more dynamic collaboration space within your organization.
What is Viva Connections?
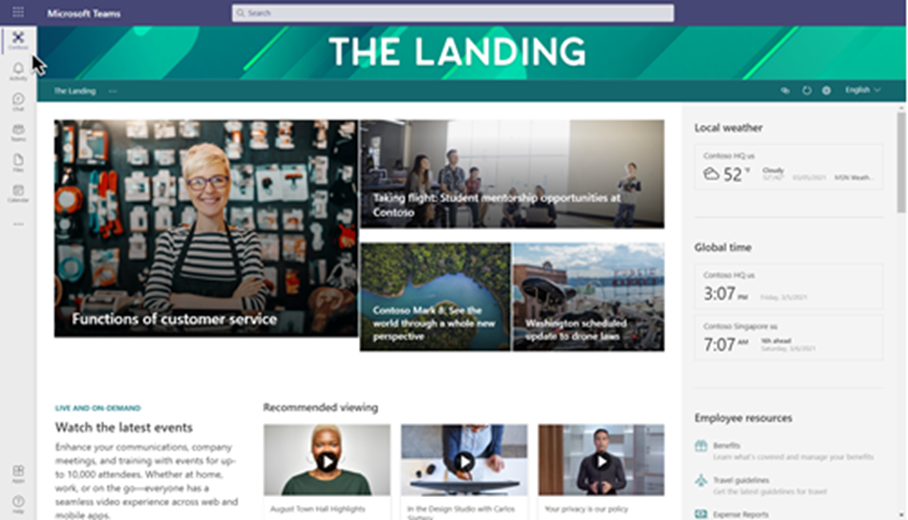
Viva Connections is one of the four components of Microsoft Viva. It’s a single-entry point for employee engagement and internal communications and a gateway to the modern user experience. Combining the power of the intranet and collaboration features of Microsoft Teams, Viva Connections—previously referred to as the Home site app—allows easy deployment of SharePoint sites in the Microsoft Teams app. It can establish an accessible portal for employees to search sites, news, and content right inside the app. As the integrated SharePoint intranet site, it can be pinned on the top of your app bar in Teams, and it can show off your organization’s branding and identity. See the below image:

Benefits of Integrating Viva Connections into the Microsoft Teams Desktop App
- Highlight user-specific sources – Through the use of global navigation in SharePoint and the AI of Microsoft Graph, Viva can show personalized content such as sites, news, and files. This will add value to the employee experience.
- Access intranet content from Microsoft Teams – Users can easily access SharePoint content without leaving Teams. Files can be viewed in the Teams file preview window.
- Search content through the Microsoft Teams search bar – Once the integration has been set up, users can search for content through the search bar and the results will be displayed on a SharePoint site in-browser.

- Easy sharing of content – Sharing features and tools are available for easy collaboration, such as sharing a link to a SharePoint page in a Teams chat.
What are the requirements and notes before deploying Viva Connections in Microsoft Teams?
- This integration is only available in the Microsoft Teams desktop app at the time of writing and will be supported through the Teams mobile app soon.
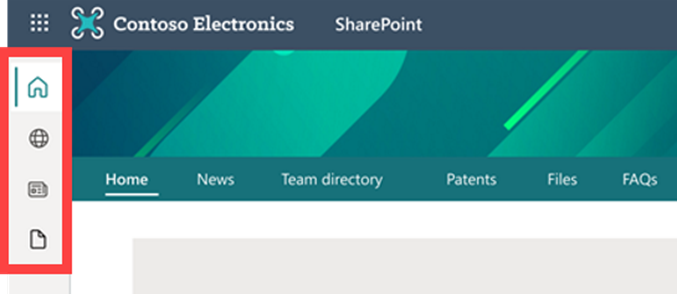
- Global navigation in SharePoint should be enabled and added in the SharePoint app bar to allow content to appear in Teams.

- For permissions, you need to have the SharePoint admin role or higher to create the connection in SharePoint PowerShell. However, only the Teams admin permission is needed to deploy the package within the Teams app.
- Remember that only modern sites and pages can be shown in the Teams app; all other apps will be opened automatically in a browser.
How to Integrate Viva Connections with Microsoft Teams
Before deploying, ensure that the permissions mentioned above are in place. There are two main steps in deploying this integration: provisioning Viva Connections through PowerShell, and adding the package in the Microsoft Teams admin center. Let’s walk through a more detailed step-by-step process.
- Set up a SharePoint home site – It is recommended that you use a SharePoint home site as the landing page for Viva Connections. If you haven’t set a home page yet, check this page to learn how.
- Enable global navigation and customize navigational links – Global navigation is required. You can check this link to review considerations for a global intranet.
- Create a Viva connection app package in SharePoint PowerShell – The script can be automatically downloaded through this download link or by visiting the Microsoft download center. Future versions will be available in the Microsoft Teams admin center. Make sure that you are using the latest version of SharePoint PowerShell.
- Provide tenant and site information to create the package – Upon running the PowerShell script, you will be asked to input required information such as Name, App description, privacy policy, company name, website, and the PNG files included in the download link. Learn more about Microsoft Teams app icons here.
- Upload the Viva Connections desktop package in the Teams Admin Center – Once you’ve finished configuring the package, the downloaded zip file will then be uploaded to the Microsoft Teams admin center in the “manage apps” menu.
- Manage and pin the newly-created app – For the final step, you need to pin this app for the users in your tenant so that they can see it in their Teams desktop app without the need for searching through the Teams app catalog. You can also configure user permissions to make this app exclusively available to the right set of users.
 Watch the whole process in this dynamic tutorial. Once everything is set, make sure to set aside time to onboard your users to maximize their Viva Connections experience.
Users can now communicate and work all in one place! Collaboration is made easy with this dynamic integration of Microsoft Viva Connections to Microsoft Teams. Try this feature now in your tenant and let us know about your favorite experience!
For the latest in Microsoft 365 news be sure to subscribe to our blog!
Adrian is currently a member of AvePoint's project management team. In his previous role as a Content Marketing specialist at AvePoint, Adrian covered the latest trends and topics on what’s new in technology, SaaS Management & Governance, SaaS Backup and Data Management.


