Need to rejuvenate your backup plan? Check out our free webinar “Practical Guide: Office 365 Backup Strategies That Scale” for expert advice. Register here.
My Top Microsoft Planner Tips
Microsoft Planner is a great lightweight planning tool that’s included in most Office 365 packages. Its basic purpose is to provide easy, visual task management for a group of users. This includes when, how, and by whom these tasks are assigned as well as their current status.
How Microsoft 365 Planner Works
Planner is also based upon Office 365 Groups. This means creating a new Planner plan will also create a Group behind the scenes. This makes it easy to govern membership and add additional workloads onto the Group in question (something we’ll get more into later).

With all that said, more advanced features for planning are lacking and no customizations are currently possible. This is no doubt part of Microsoft’s intention to keep Planner a simple tool for everyone to pick up and use. For people needing a more heavyweight planning tool, Microsoft Project is preferable.
For those looking for a more streamlined experience, though, here are four Microsoft Planner tips to make the most of both new and often overlooked features.
Microsoft Planner Tip #1: Do Planning Your Way
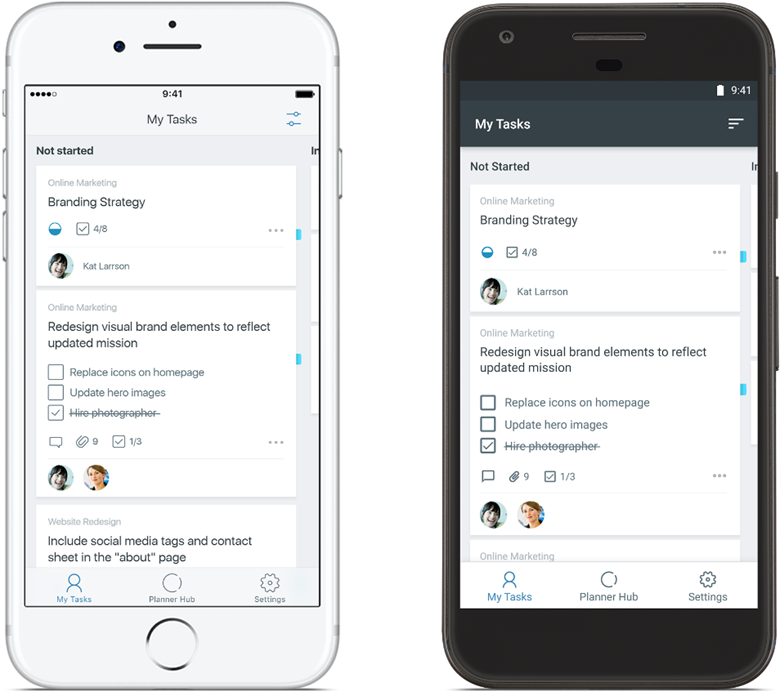
As Microsoft 365 Planner is a cloud service, you can access your plans and tasks from anywhere on multiple devices. You have a few alternatives aside from working in a browser.
I recommend downloading the Planner mobile app so you can work on your plans, assign tasks, share files, get updates on progress and more on-the-go.
If you’re using Microsoft Teams, Planner is a great way to keep track of your team’s tasks as they update the status in real time.
Microsoft has done a terrific job of integrating the two services. Just add a Planner tab in one of your Team’s channels. This allows your team to create and organize tasks within Teams.
GET OUR NEWSLETTER: Subscribe here for weekly content from AvePoint
As mentioned before, both Microsoft Planner and Microsoft Teams use an Office 365 Group for membership, making membership and permissions easier to govern.
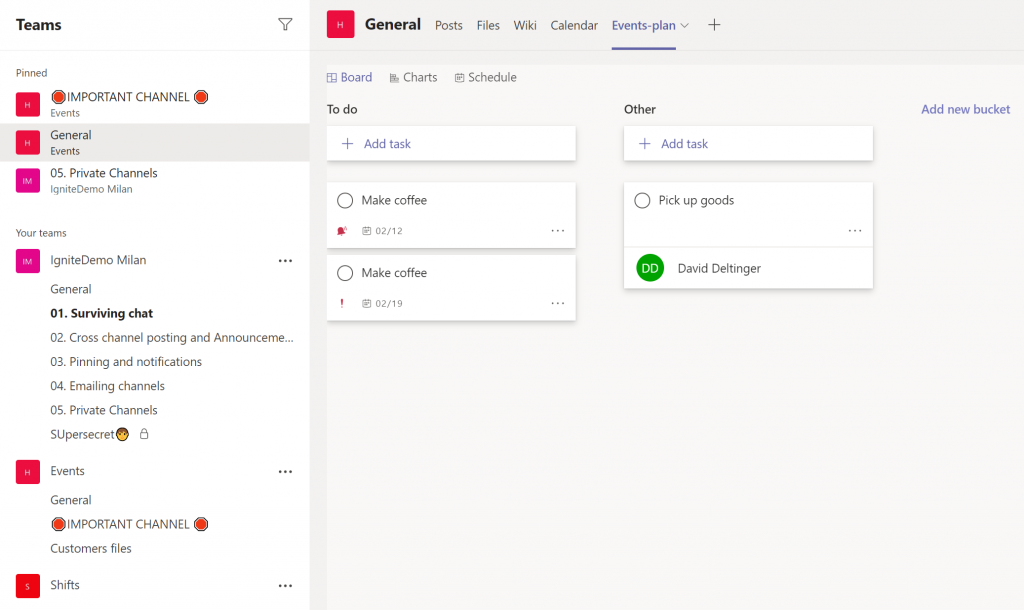
It’s also possible to create several plans that share the same Group from within Microsoft Teams. Just create a new Planner tab within the same Team and choose to create a new plan. In this scenario, you can have different Planner plans for every channel, but they all share the same Office 365 Group.
Also, remember to add the Planner app to the left rail in Teams for an easy overview of all the plans you’re a member of. From here, you’ll be able to sort and filter all your assigned tasks.
Tip: Email notifications for task assignment are automated, but if you use Microsoft To-Do with your organizational account, it’s possible to get all your assigned Planner tasks into the To-Do app.
Need help optimizing your MS Planner usage? This post might help: Click To TweetMicrosoft Planner Tip #2: Copy Your Planner Plan
A fairly new feature in Planner is the ability to copy a plan. You might’ve spent some time creating buckets and adding tasks in the past that you would now like to make a copy of and use in another context. This is possible, but with a few caveats.
For one, you need to do this from the browser by going to a plan you wish to copy -> click the three dots and choose “Copy plan.”
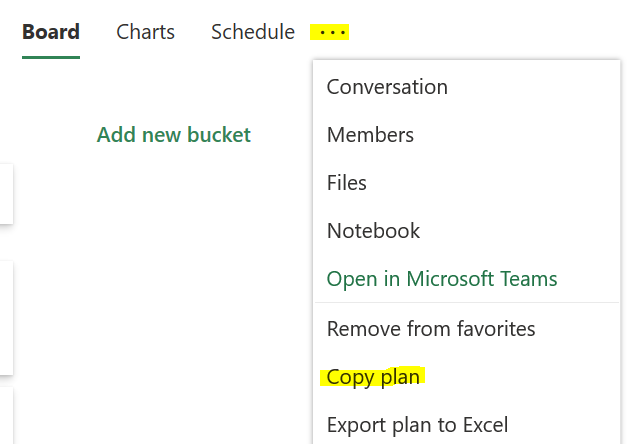
Doing this will prompt you to create a new plan to which your content will be copied. (Keep in mind you can’t copy the content to an existing plan).
The next part of this Microsoft Planner tip is a bit tricky, so stick with me. Creating a new plan creates a new Office 365 Group. This means that if you use Planner in Microsoft Teams, you can’t make a copy to use in that same Team. Instead, you would need to copy the plan and then apply a Team to that newly created Office 365 Group.
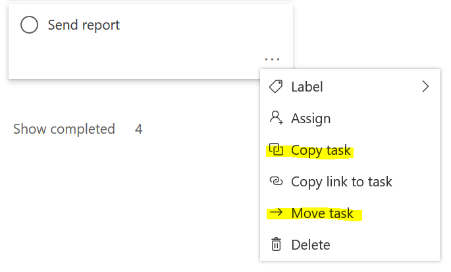
In the above scenario you can also copy or move individual tasks between different plans. It can take some time depending on the number of tasks, but since you can choose to copy all content within a task such as checklists, assignments, dates, etc., it might be worth it.
Microsoft Planner Tip #3: New Priority Options
Not long ago, Microsoft added the “Priority” options to Planner. The different options you can set on a task can be seen in the picture below:
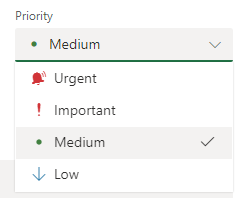
This is a welcome option to easily grade the importance of your tasks. Microsoft also added the “group by priority” option which makes it easy to get an overview of the different tasks based on set priority:

You could previously use labels and filters to get a similar outcome, but with only six labels available for every given plan, these can now be utilized for other purposes.
Planner Tip: You can also use filters on priority to get the exact view you’re looking for.
Microsoft Planner Tip #4: Your Tasks in a Calendar
In Planner you can choose between three different views:
- Board – All your buckets and belonging tasks
- Charts – A visual overview
- Schedule – A calendar-like overview

By selecting “Schedule” you can see a calendar view of the tasks that have any start and due date set. You can also drag and drop tasks with no date set directly onto the schedule—the date will then automatically be set for the task. Furthermore, it’s possible to create new tasks directly from the schedule view.
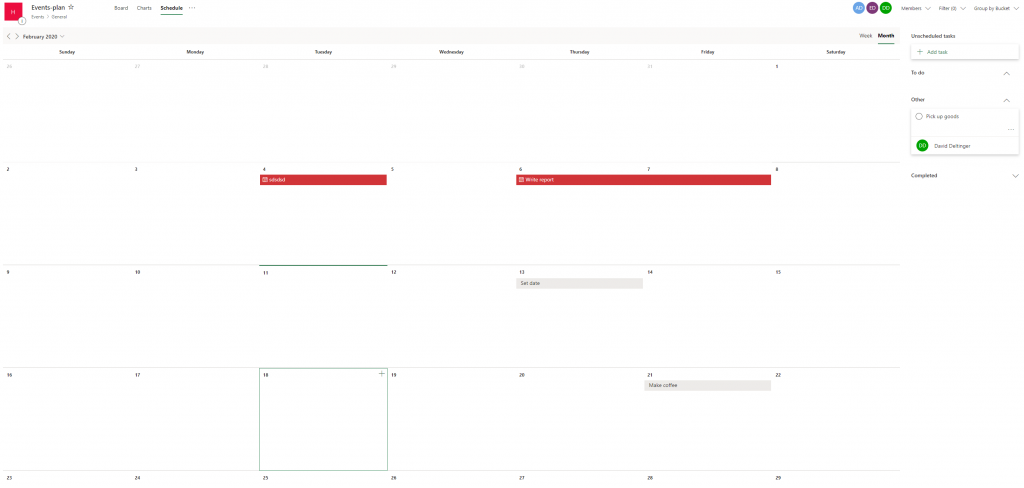
If you click the three dots next to the previously mentioned views, there’s an option to add this plan to your Outlook calendar:
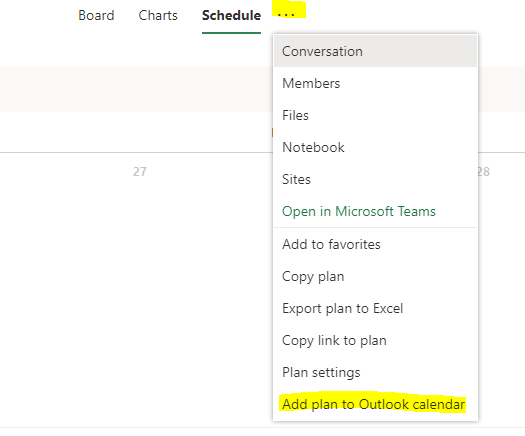
This will create an iCalendar feed you can subscribe to and use to access your tasks directly from your Outlook calendar. You will only be able to view the task from here, but luckily there’s a link that takes you directly to the task in Microsoft Planner.
I hope these Planner tips will benefit your current usage or encourage you to start use the service. Please stay tuned for my next blog post where I give you even more Microsoft Planner tips on how to work more efficiently.
The follow-up to this post “A Look at What’s New in Microsoft Planner” is out now!

