Securing Collaboration: How to Build a Strong Office 365 Permissions Management Strategy


Read our Mitigating Collaboration Risk eBook for a deep dive on Office 365 security and compliance.
Read the other posts in our Securing Collaboration series below:
- How to Get ISO 27001-Ready
- Oversharing Challenges in Microsoft 365
- How to Find Sensitive Content in Office 365
- Sensitive Info Identifiers in Office 365
- 5 Risk Management Challenges in Office 365
- Top 5 Microsoft 365 Security and Compliance Center Features and Tricks
- Office 365 Governance in an Always Online World
- When to Upgrade From E3 to E5 for Stronger Microsoft 365 Data Protection
Having a strong strategy for how users should be sharing content and access to workspaces in Microsoft 365 is a must, especially when it comes to sensitive or confidential information. More than a document or plan, a sharing/access strategy should be well thought through and communicated with users and stakeholders in your organization. Everyone collaborating needs to understand why mitigating access to sensitive information is important and why it’s beneficial in the long run to remain in-line with your strategy.
Permissions, on the other hand, are what determines who can access which documents in files within Teams, SharePoint libraries, and OneDrives in Microsoft 365. Sometimes more generally referred to as “Security” or “Sharing,” there are different levels of permissions that designate access to workspaces (Sites, Teams, etc.) and documents across the platform.

Finally, Security Groups (including Members and Owners of SharePoint Sites and Microsoft Teams/Groups) are one way to help grant access to information to the right users and restrict the wrong ones while still managing to keep a general sense of how access is mapped to collaboration content across the environment.
Security groups link users together as a cluster, so if the group is granted access to content then every member of that group has that same level of access. Note that Security Groups cannot be added as members or owners of Microsoft Teams or Microsoft 365 Groups (though this isn’t the case for the SharePoint sites where their content is stored).
One of the most common strategies to accomplish this kind of control is to create Active Directory Security Groups in the Azure Portal that correspond with business units, regions, departments, and sometimes even collaboration groups such that users can safely include the right segment of people when they share content. It’s very important to make sure that Active Directory/Microsoft 365 user profile information is kept up to date to maintain this strategy over time.
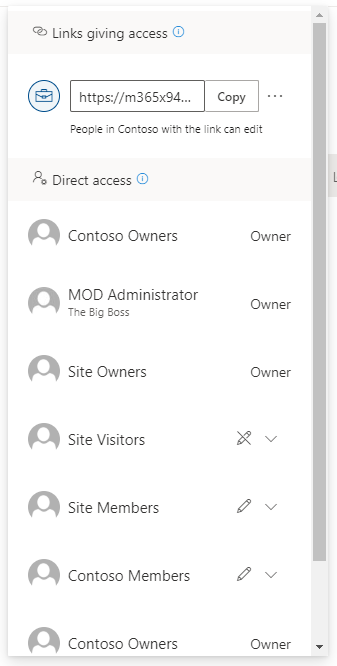
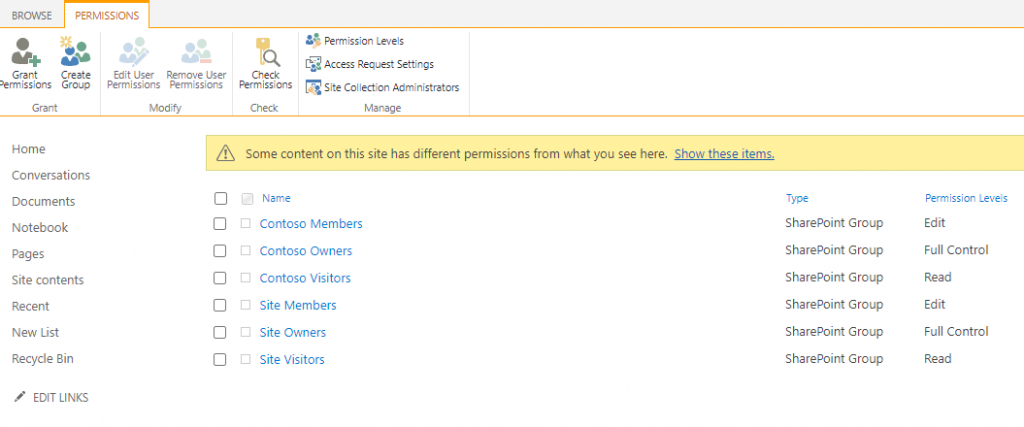
PowerShell can also be used to quickly gather access to information for any given location(s) in Microsoft 365. If you’re a person who’s terrified of any coding or scripting (just like I was not too long ago) don’t let this intimidate you! Getting permissions information is one of the simplest one-line commands that you can run in PowerShell and is a GREAT place to start to learn!
I was completely unfamiliar with it when I first started, and after about 30 minutes of reading documentation and watching some YouTube How-To’s (I personally recommend Shane Young), I was able to get and change permissions information across Microsoft 365 in no time! The reports extracted via PowerShell can give a great deal of information regarding access and can be sorted and filtered to better understand which users and groups have access to what content.
Dynamic Groups
Dynamic Groups in Microsoft 365 (Via Azure AD) allow you to filter which users are members of a particular Security or Microsoft 365 group.
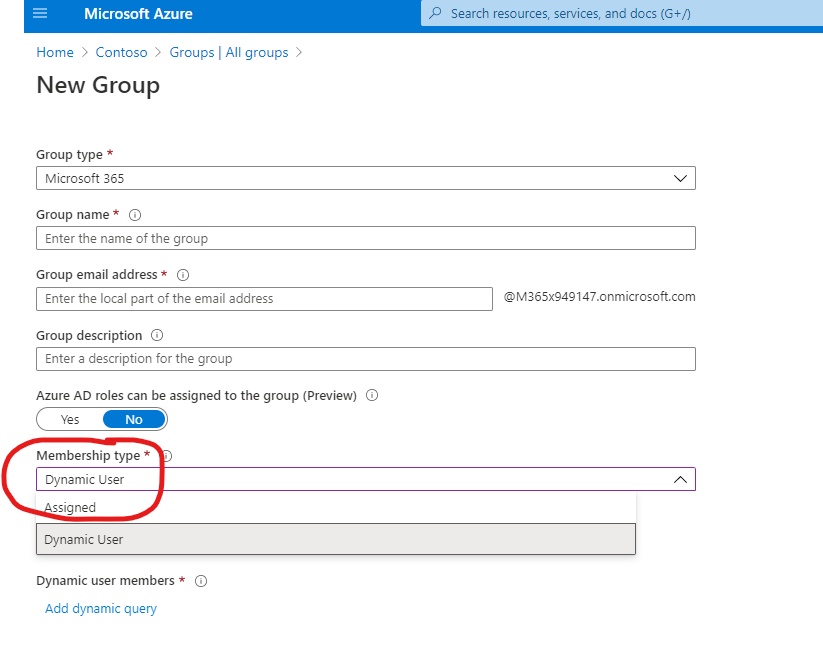
Generally, this is used to sort members into groups based on their user properties so admins don’t have to manually update which users are part of which groups as user profiles are created, changed, or deleted, taking a step out of this process. Dynamic groups make it much easier for organizations to accurately maintain security groups based on properties like region, role, business unit, department, etc.
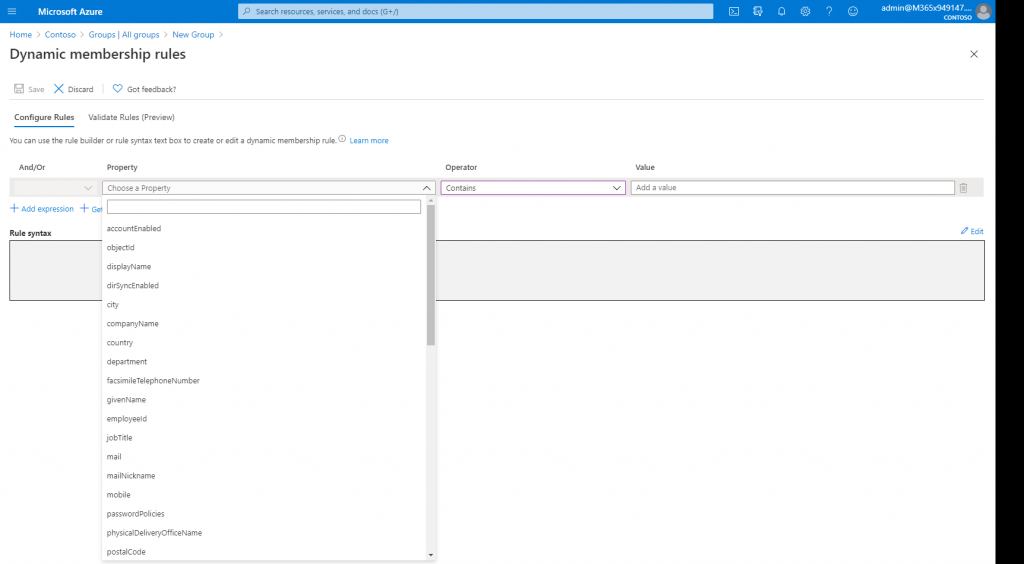
It also gives organizations a tool to get more specific with groups of users without adding substantial burdens to their workload. For instance, an organization may have security groups for each manager or even each project by grouping properties, allowing for greater security controls and easier collaboration for its users.
Activity Logs
It’s always good to browse and save audit logs for Microsoft 365, especially for activities involving sensitive content or areas where sensitive content is stored. An activity that takes place in SharePoint can give you insights into which users are sharing what from which locations in Microsoft 365, and once the report is downloaded it’s possible to filter information by location. The activity logs are held in the admin center for a rolling period of 180 days, so if you’d like to retain long term records it’s best to download your activity logs on a regular basis.
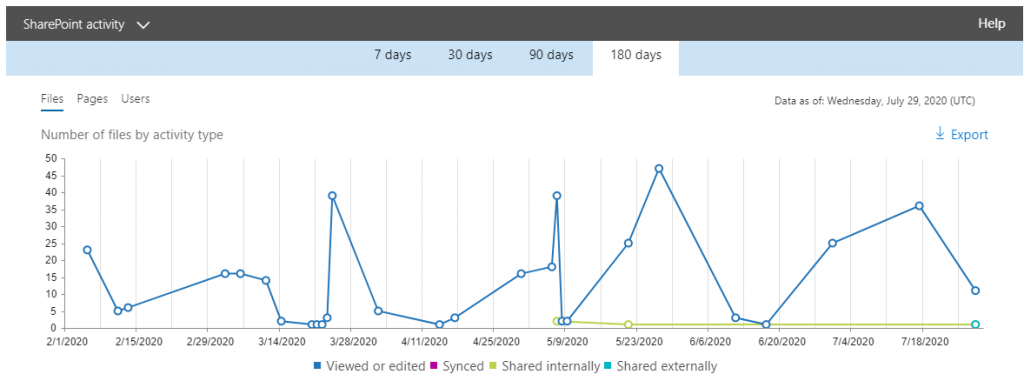
There are also additional options to report on activity specifically relating to your DLP policies, logins, and email activity in the Security and Compliance center, but with the exception of DLP activity, these are mostly geared towards also important but broader risks (threat detection, email, and login security, etc.), not necessarily towards access and the over-sharing of sensitive information.
Sensitivity Labels
With an E3 license, sensitivity labels can be used to allow users to control which groups of users can have access to which types of content or locations within Microsoft 365. They can also be used to apply advanced security features like adding encryption or watermarks and guarding against use on certain types of devices. It’s even possible to apply controls to which users have the ability to apply labels to documents. Creating labels and setting the controls for documents within Microsoft 365 is simple, even with the variety of options available.
Labels designating policy controls can be manually added by users, but with an E5 they can be automatically applied.
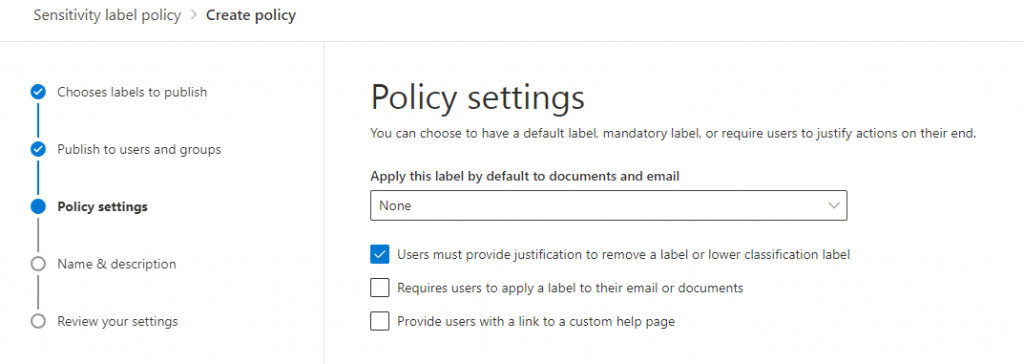
The granular enforcement that sensitivity labels bring to Microsoft 365 can be a powerful tool when used properly.
Data Loss Prevention/Retention Policies
Retention labels/policies allow you to set retention rules to documents that meet predefined guidelines or quickly understand which documents in Microsoft 365 have sensitive information. They are primarily used to tag information in Microsoft 365 for the enforcement of content lifecycle management. Once applied, however, you can build DLP policies to report on the labels for further understanding of where your sensitive content exists. You can use this reporting to quickly understand which files have many instances of content that matches sensitive information types or even custom defined information.

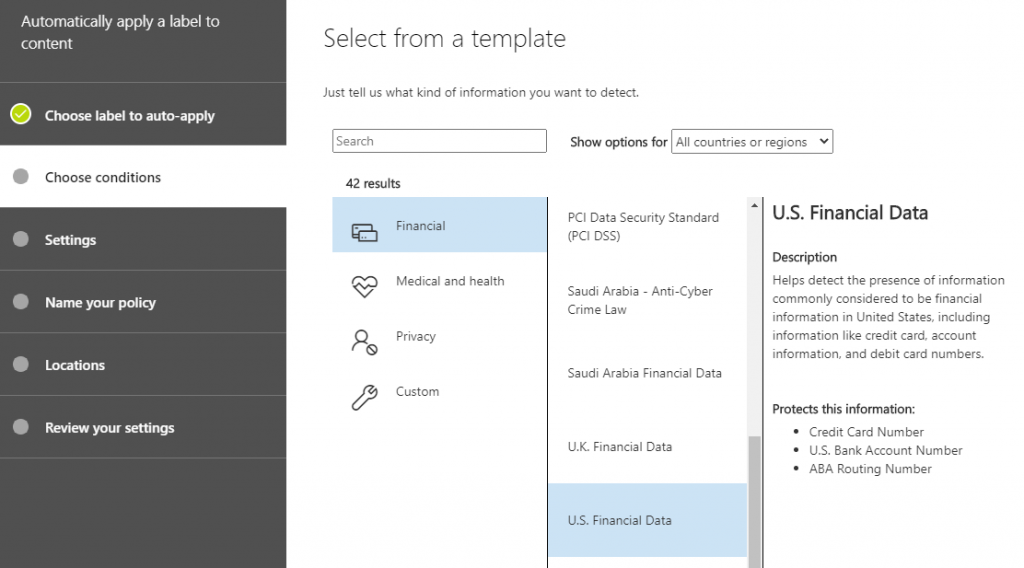
Choosing what kind of information you’re looking for within Microsoft 365 is a relatively painless process, as is applying the locations where such labels may be applied. It’s important to note that retention labels are primarily for information in SharePoint sites and OneDrives, so if you’re looking for sensitive information in Teams Chats or in Exchange you’ll need another DLP policy for that content.
If desired you can build DLP policies that will report on all instances of sensitive information, but this will not give you insight into documents that have retention labels applied.
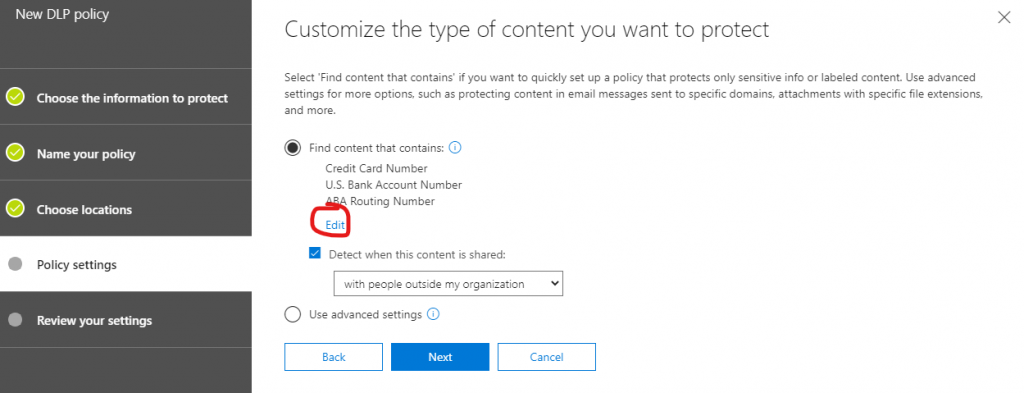
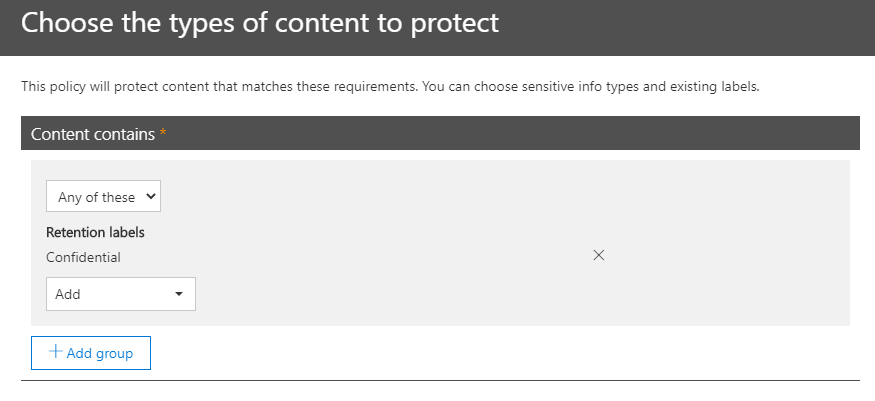
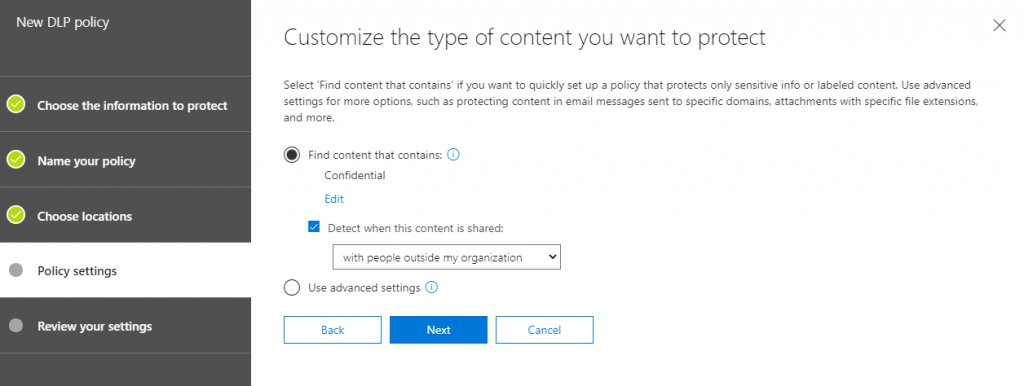
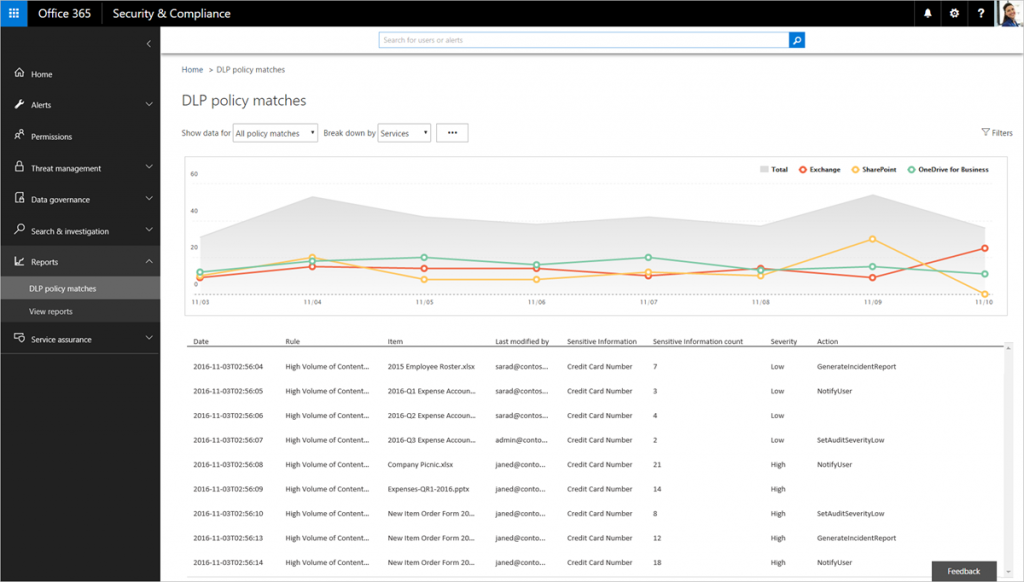
Once your labels and/or policies are applied, DLP reports make it easy to understand where your sensitive information exists and which documents have the most sensitive information in Microsoft 365.
SharePoint Sharing Settings in the Admin Center
The security settings in the SharePoint Admin Center make it super easy to apply external sharing controls to SharePoint and OneDrive for Business. You can also control whether sharing links can be used externally and set how long they can exist in the environment. There’s also the capability to manage membership and ownership for each of your SharePoint Online sites, as well as controls around naming, guest access, and provisioning for SPO.
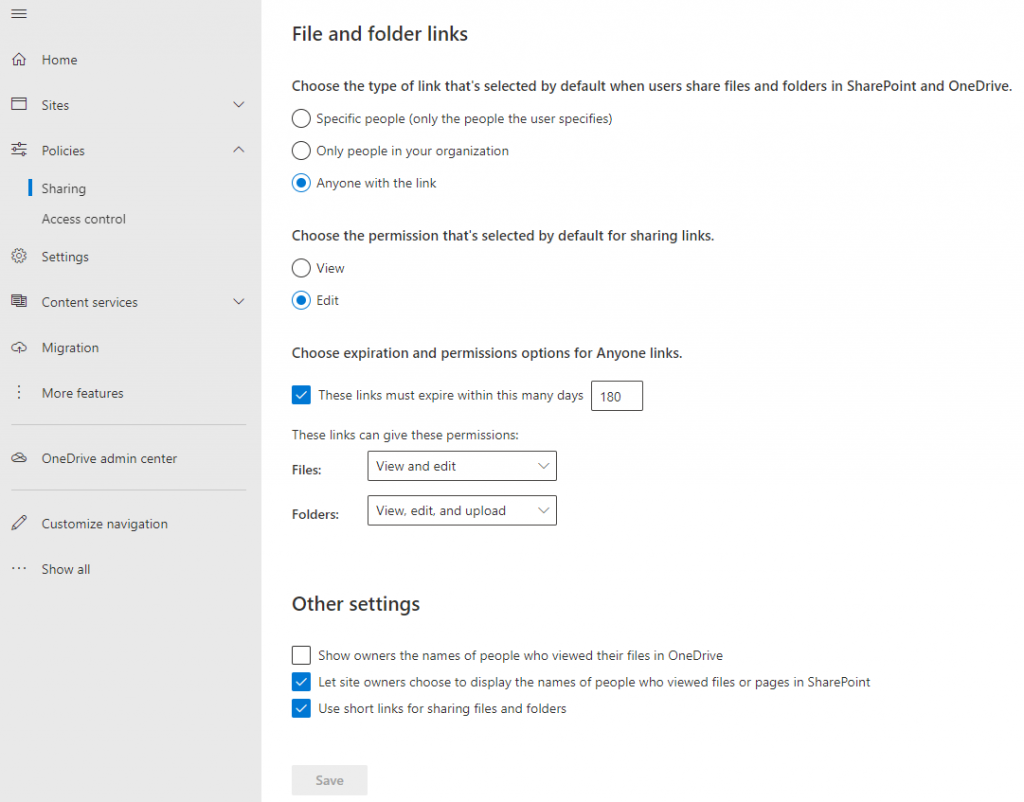
The SharePoint Admin Center is really the fastest way to lock down most sharing that occurs in Microsoft 365.
Microsoft Teams Permissions Policies
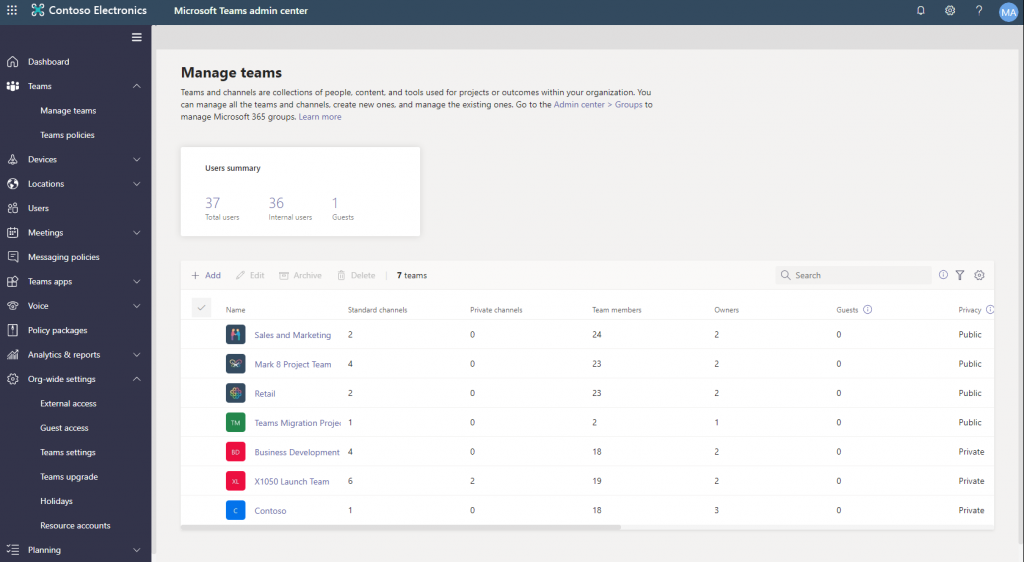
The Microsoft Teams admin center enables controls for which users can access certain apps and features in Teams, which allows controls for many of the features available on the platform. Teams administrators can view and edit Team settings, guest users, membership, and control which apps and settings are available in Teams tenant-wide. Teams policies can also be used to control which users or groups may or may not create private channels in Teams.
Additionally, Teams policies offer many controls over conversations and meetings, such as which sensitive words can or cannot be used and which calling and meeting features are available to segments of users in the organization.
Managing Access and Security Policies Across Microsoft 365
There are a lot of powerful tools to manage security and collaboration in Microsoft 365! However, it’s important to understand that while all these tools help secure sensitive information and collaboration for exposure to sensitive documents, there’s not really an interface that gives a comprehensive view of who has access to what kinds of information across Microsoft 365 (permissions), nor a way to prioritize sensitive information based on exposure or location. With permissions inheritance, sharing links, security groups, and all the other access capabilities in Microsoft 365, it‘s difficult to gain an accurate understanding of who really may be able to access information.
In addition, it can be very difficult to apply and keep track of so many policies in ways that scale with your organization’s growth while still meeting the needs of your users.
AvePoint’s new Policies and Insights solution does all this heavy lifting for you! Policies and Insights (or PI) gives you the tools you need to understand who has access to what in easy ways, while also making it quick and easy to understand where your sensitive information exists. Most importantly, PI gives you the tools to prioritize sensitive information based on how many people have access to it and who those people are.
PI is also one of the only solutions that doesn’t require you to constantly look at reports and make manual changes across your environment; it can automatically enforce security and other settings, reverting out-of-policy changes or notifying the necessary parties when they occur.
If security and risk mitigation is becoming a higher priority for your organization, be sure to set up a time to chat with us and learn how we can help.
For more on content sharing and permissions management, be sure to subscribe to our blog!

Hunter Willis has been in web development, SEO and Social Media marketing for over a decade, and entered the SharePoint space in 2016. Throughout his career he has developed internal collaboration sites, provided technical and strategic advice, and managed solutions for small to large organizations. In addition, Hunter has served as a strategy consultant for many companies and non-profits in the Richmond area.


