Advanced SharePoint Search Guide: What Every Professional NEEDS to Know


New to SharePoint sites? Read our latest article on 5 SharePoint Site Design Best Practices for Beginners!
You may be surprised to learn that there’s more to getting relevant search results than dumping some words into a SharePoint search box and pressing enter. SharePoint search comes with a ton of additional features that allow you to enhance the quality of your search query and garner significantly better search results.
The guidance in this post is more advanced than simply using the out-of-the-box search interface. It also doesn’t affect the searchability of a file (that’s a different post), only how to get the most out of the search query itself. This post is about how your search query—the text you put in the search box—can improve the search engine’s output.
Keep in mind that the search center isn’t currently available in the Modern SharePoint experience. Now without further ado, let’s talk about some of the most efficient options you have at your disposal.
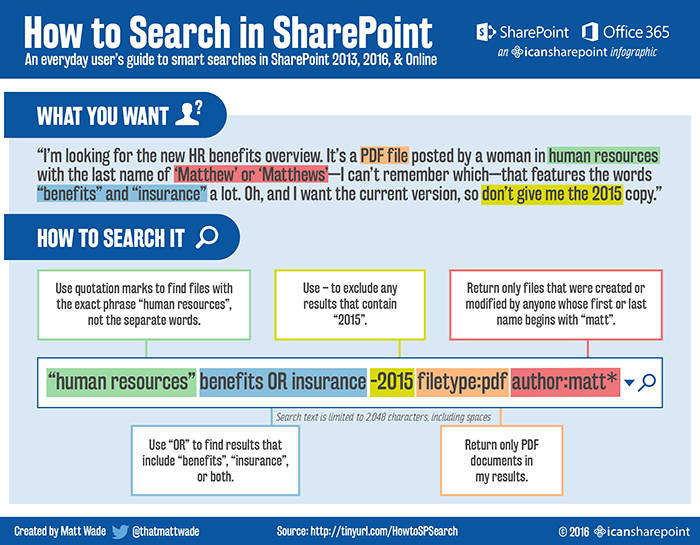
What SharePoint Searches
First, it’s important to know what SharePoint even looks at. SharePoint’s search engine goes through all sites, pages, wikis, lists, libraries, folders, and files in SharePoint.
SharePoint searches the full text of documents as well as their metadata. Metadata includes the file name, title, author, and any keywords or category systems you’ve put in place. Metadata ranks higher than full text to the search engine. (Unfortunately, I can’t tell you how much more value the engine places on metadata because Microsoft doesn’t reveal that proprietary information.)
Search results only display the content you have access to. In the SharePoint world, we call this “security trimming.”
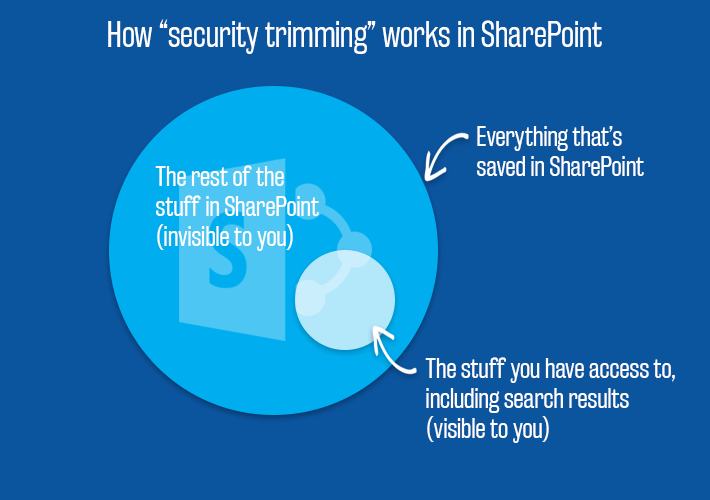
SharePoint only returns results that are indexed. “Indexing” is when the search engine finds everything in the system and makes a record (a.k.a. an index)—of it.
Generally, most if not all SharePoint content is indexed. But if you’re not getting the results you expect (i.e. a file you think should show up in your results doesn’t appear at all), indexing could be the problem. In that situation, you should raise the issue with your IT department.
Need tips for getting the most out of your search experience in SharePoint? Check out this post: Click To TweetWhere Do You Want to Search?
It’s important to know where you’re searching. You can get better results simply by searching only in a particular site or library as opposed to defaulting to searching “Everything.” This is useful if you know the site or library where that file lives but have trouble finding it with a quick skim.
Why? Because by limiting your search to only a site or library, you immediately remove any extraneous results that live in other sites but may still match the words and phrases you use in your search query.
Global search boxes let you search “Everything,” “People,” “Conversations,” and “This Site.” Choose the appropriate one. Note that if you choose the “This Site” option, it searches the site you’re in plus all sub-sites below that site, which means that your results might be more wide-ranging than you might have intended.
Document libraries each have a search box and return results directly in the library. The results are basically a filtered view of the library content based on your input terms; you don’t actually go to a search results page. Type your search terms in the “Find a file” box located to the right of the view names.
Search Alerts
Sick of having to repeatedly input a complicated search query to see if your results have changed? The next time you search, scroll to the bottom of the page and click “Alert Me.” Get a SharePoint alert whenever the results page changes or the content within the results themselves have changed.
Using Advanced Search
SharePoint offers an advanced search page, but it’s not the most obvious feature. Advanced search lets you add logic to your search without having to type out search operators. This greatly assists in narrowing down your results to be as appropriate as possible.
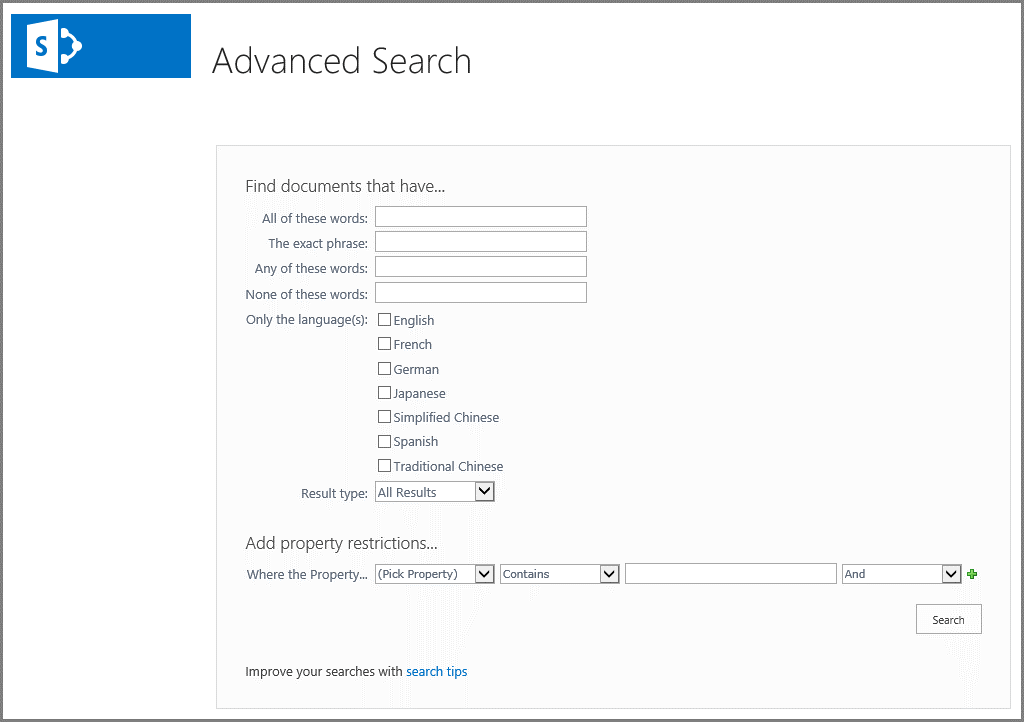
How you can get to your advanced search page depends entirely on how your admins set up your search system. The easiest way to get there is to search Advanced Search in a search box set to search “Everything” and it should be the top hit. (I know, so meta).
Another way to find the advanced search page is to scroll all the way to the bottom of any search results page and click Advanced Search. If you’re using SharePoint Online, your advanced search is probably at the following link: https://[domain].sharepoint.com/search/Pages/advanced.aspx

Bookmark/favorite that page, and maybe ask your IT admins up to include a link on the corporate home page for quicker access.
Continuing with the example shown at top, here’s how to get the same search (actually, a bit better), using advanced search. In this case, the search will return results that meet the following requirements:
- Contain the exact phrase “human resources” AND
- Contain the word benefits OR insurance AND
- Your results will exclude any files that contain the text 2015 in them AND
- The results will only display documents (PDFs or Word docs) AND
- The last person to modify the file has “Matt” in their name somewhere (which will return someone with the last name of “Matthew” or “Matthews”) AND
- This search will limit results to files that were last edited between 1 January 2016 and 28 February 2016 (because let’s assume you know the file was last uploaded or edited in January or February 2016).
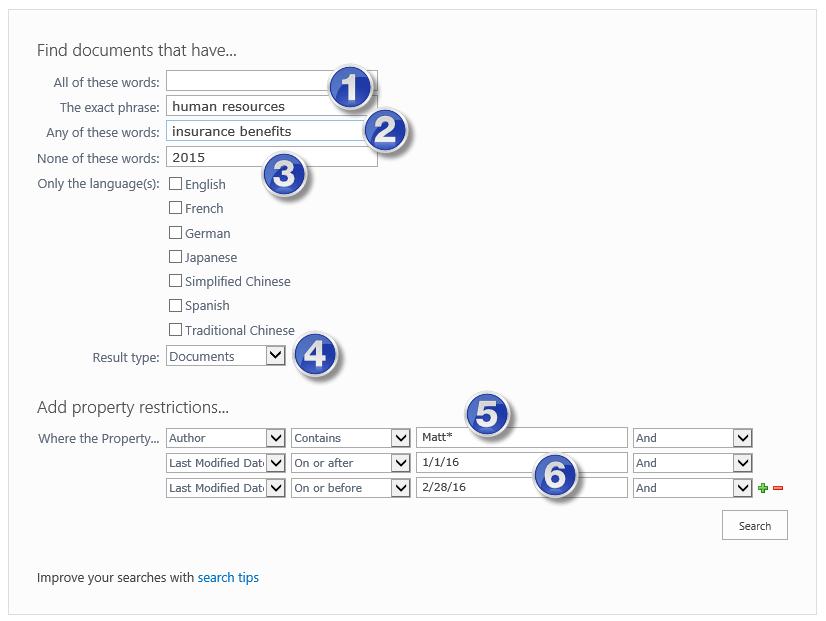
And yes, I agree that if you’re working in a SharePoint system with people who only work in one language, it’s annoying that the language option takes up so much space. You’re stuck with that out of the box.
Results Refiners
Refiners are the most powerful way to improve your results (the option is found on the results page). They allow you to filter your results by excluding extraneous date ranges, file types, and authors.
Choose the author or file type you want to see results for or move the scale on the modified date range. This helps clear out useless results and surfaces more relevant information.
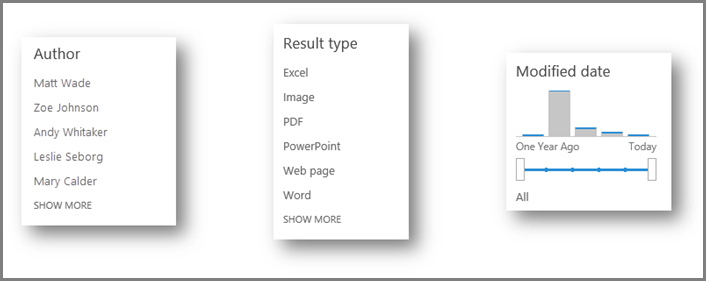
The date refiner is logarithmic. Well, sort of; it’s definitely not linear. The points on the scale aren’t separated the way you might think. See below for an idea of how it works.
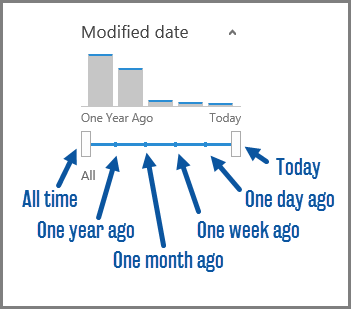
Additional search refiners can be set up by your IT department.
Searching in the Modern GUI
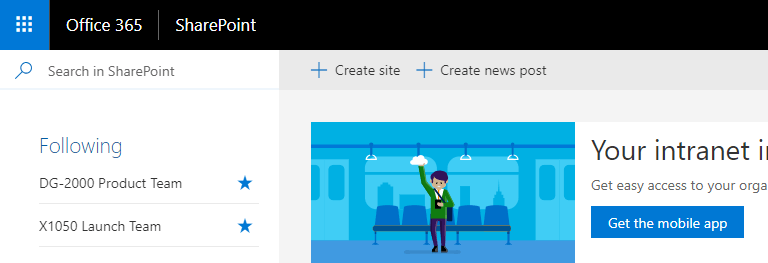
In the SharePoint application or while visiting any SharePoint Modern Site, there is a search bar in the upper left corner of the site. From the SharePoint Application Home screen, you can search all accessible SharePoint content.
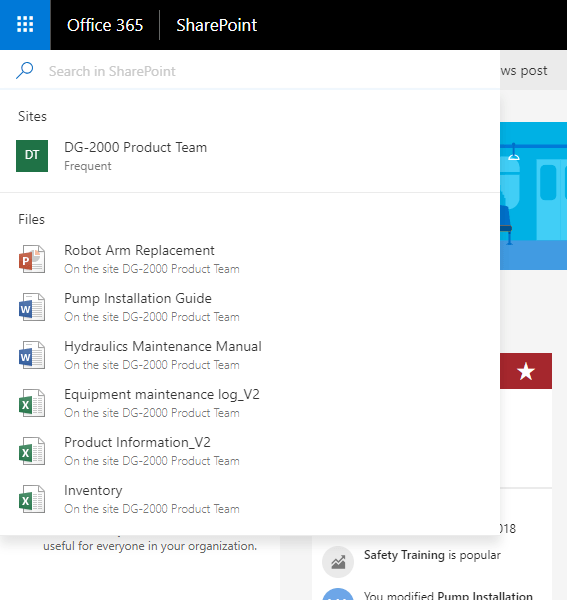
When you click the search field, suggested results will immediately show up and change as you type your search term. You can also select the “See More Results for…” option at the bottom of the results shown to see a list where you can filter and sort results according to your search terms.
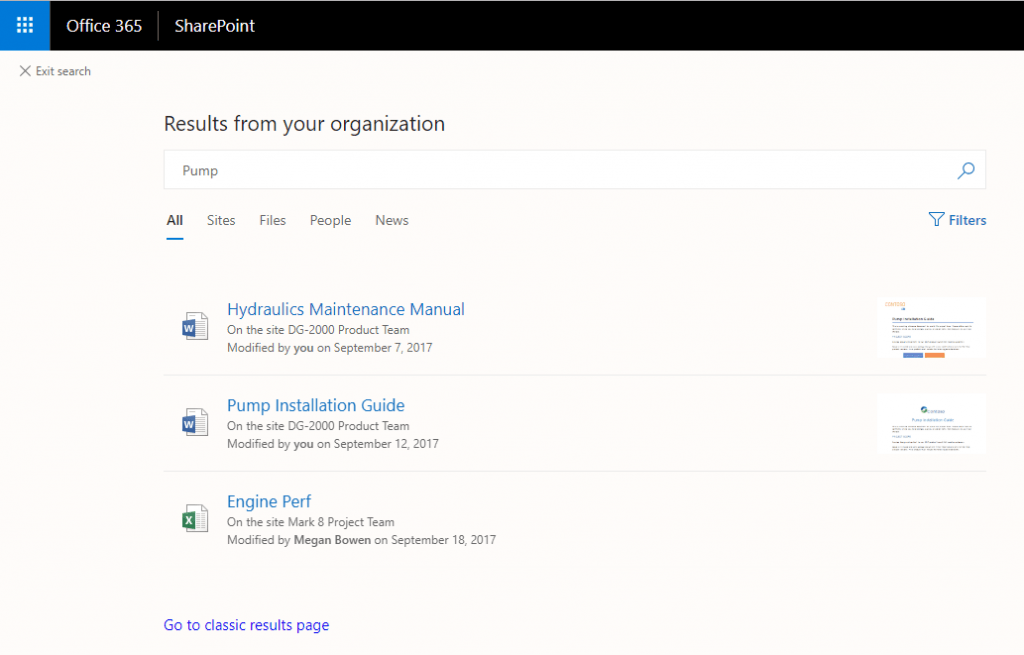
Once your results come up as you type, you can filter by Sites, Files, People, and News results, and you also have the option to filter according to other available criteria. In addition, you are given the option to “Go To Classic Results Page” where you’re given more of the options shown throughout the rest of this article.
Conclusion
You should now have the knowledge to make smart search queries. These tips here should apply no matter what you’re searching for. Plus, a lot of what you learned here is applicable to Google and Bing.
Want more SharePoint search tips in future posts? Subscribe to our blog for updates!


