3 Ways to Drive Business Efficiencies With Power Automate

As the world embraces new technological innovations that shape the future of work, automation tools like Power Automate are gaining recognition for their capabilities to drive efficiency in how users work.
Business automation, which is less about replacing humans with computers and more about discarding repetitive, manual tasks, creates more efficient processes that help users focus better on their more important responsibilities and innovative solutions.
In this WorkMarket report, 99% of business leaders and 81% of employees believe that automation has advantages. Notably, these benefits include a reduction in manual errors (48%), an increase in the speed at which tasks are completed (42%), and better quality work products (38%).
How can business automation help your business? Here are three easy ways to get started with Power Automate:
Check out how Heineken utilized Power Platform’s automation capabilities to drive efficiency in their tasks and workflows.
1. Create automated approval workflows
Approvals are a part of every organization, whether requesting a vacation, getting signatures for a report, or any other instance where you need a colleague’s decision before moving forward with a work process.
In Power Automate, you can create an automated approval workflow for various business scenarios. No more volleying emails back and forth or making a Teams group chat every time you need everyone’s (or someone’s) signature or approval. Simply start the process and let Power Automate do the rest.
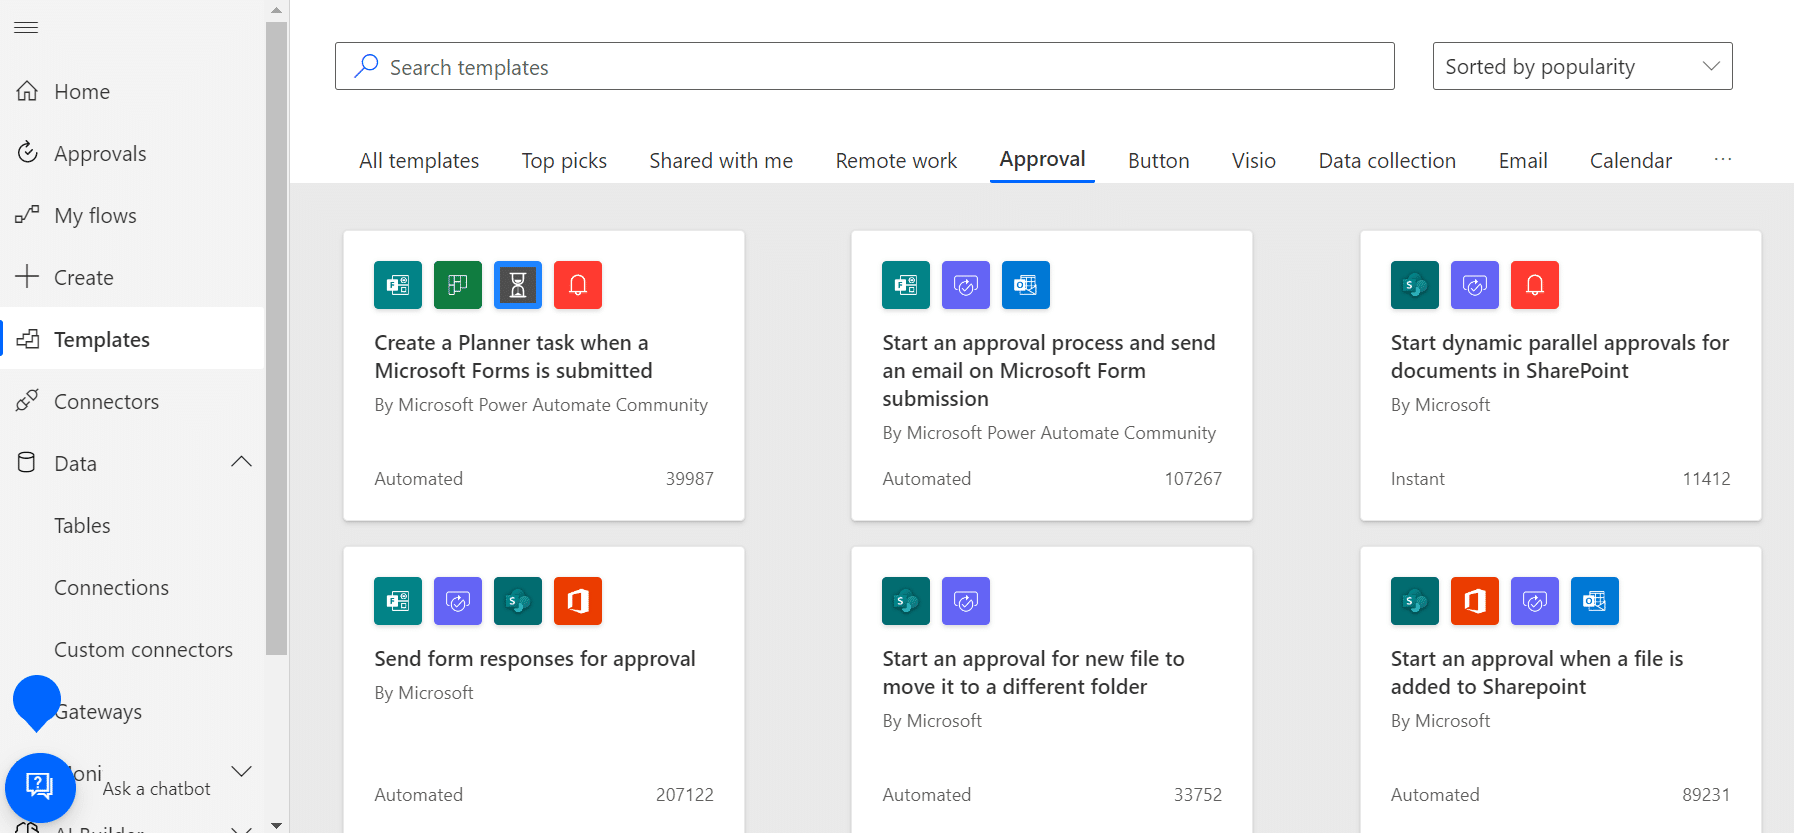
To begin creating approval workflows, you can use a Microsoft template, modify a template, or start completely from scratch. In the left pane of your Power Automate dashboard, you’ll see the options to Create a cloud flow or to use a Template.
If you choose to create from scratch:
a. Choose between:
i. Automate cloud flow: when you want an event to trigger your approval workflow automatically. For example, uploading a file to a particular folder starts your approval flow run.
ii. Instant cloud flow: when you want to trigger your approval workflow manually.
b. Give your flow a name and select how you want to trigger your flow.
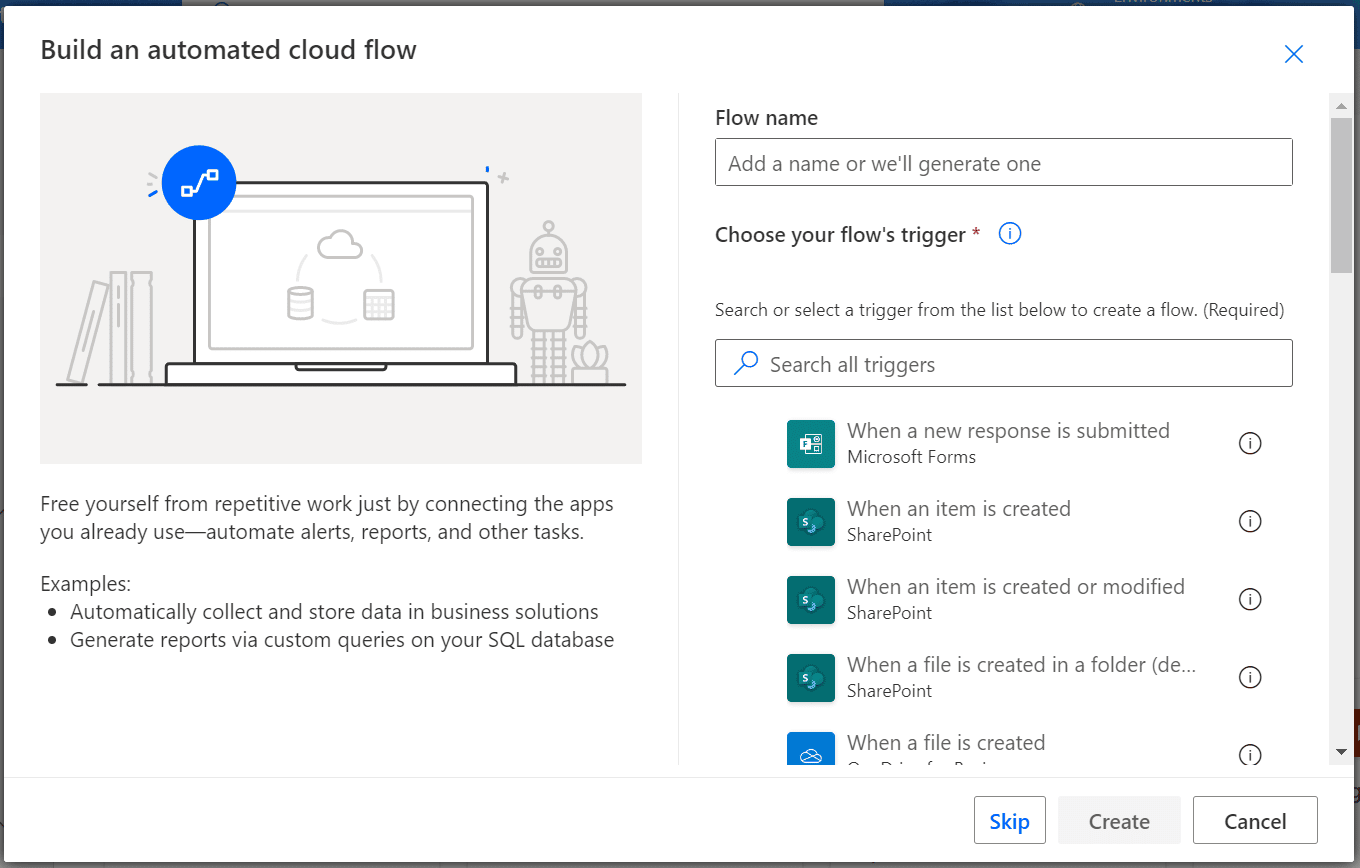
c. Build your approval workflow with these components:
i. Actions: the event that you want your flow to perform once your trigger starts the flow. In this case, you have to add Approval actions: 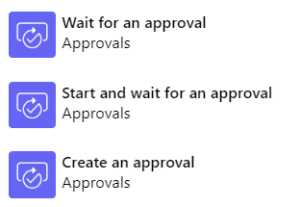
ii. Condition: this is where you specify what happens when the approver selects an action. For example, if your file is approved or denied, you can automate a Teams message and/or an Outlook email to notify parties of the said decision.
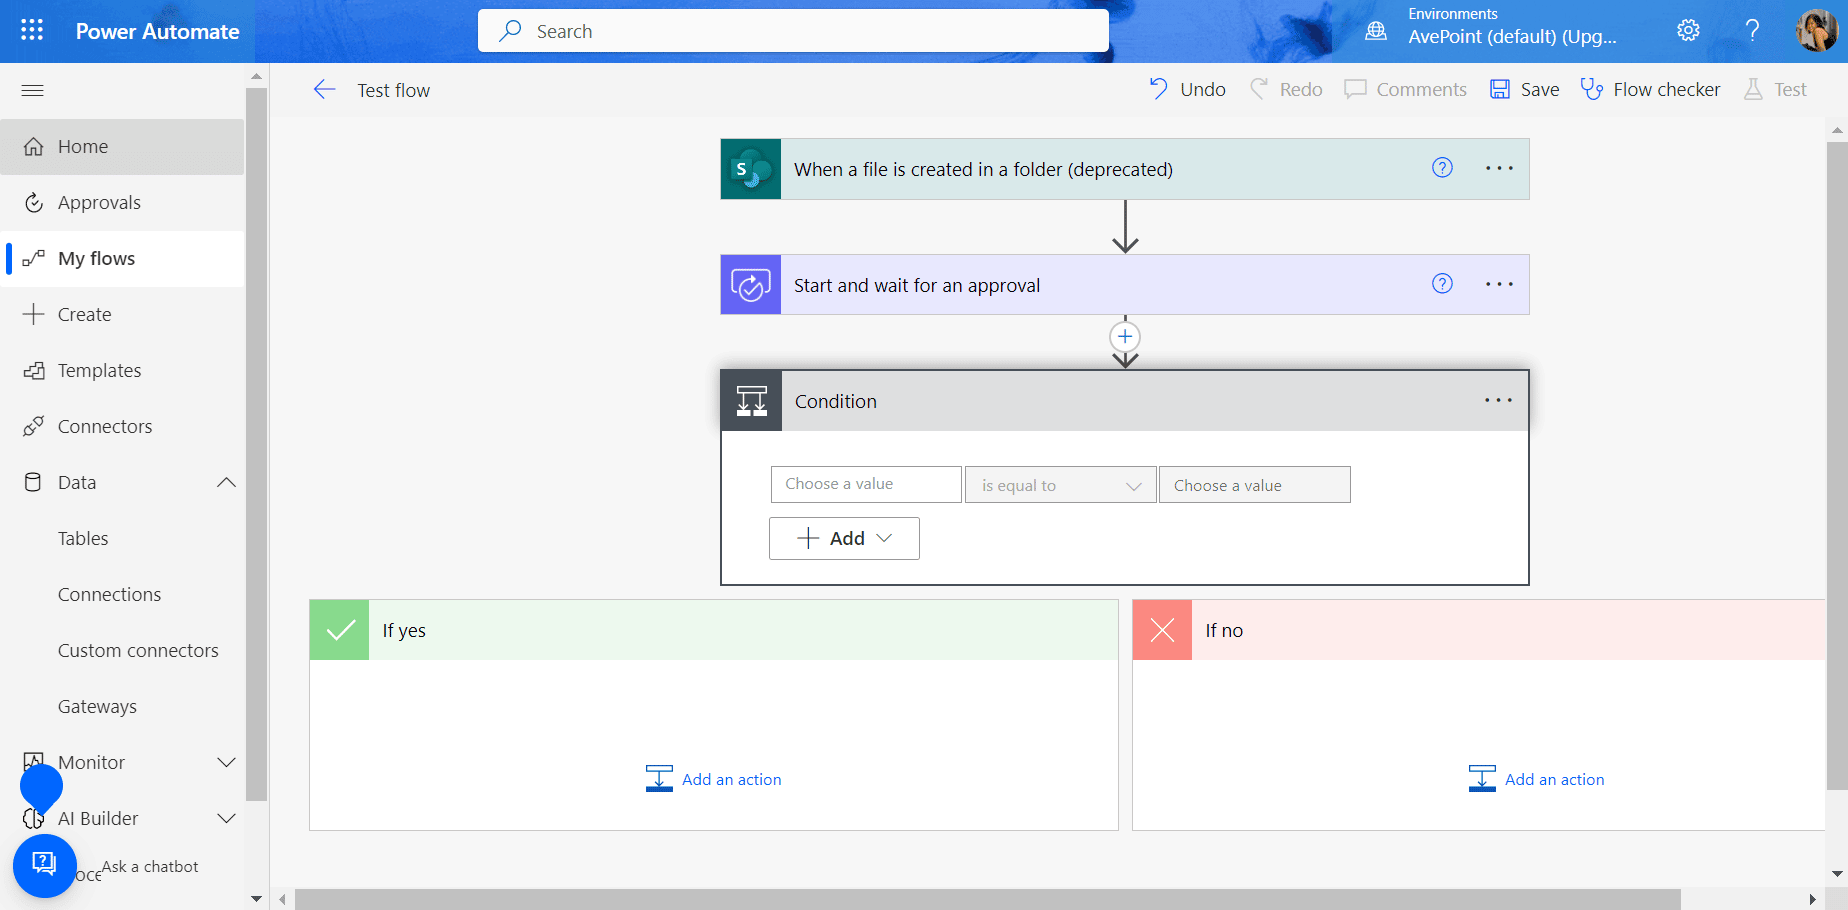
You can add more triggers, actions, and conditions (and other components) to customize your approval workflow according to your business need.
Depending on your license (basic or premium), you’ll be able to use a number of connectors which will determine which apps and services you can include in your flow for triggers and actions. Premium licenses provide more options to connect your Power Automate to other third-party apps
If you want to start with a template:
a. Browse among the multiple templates provided and choose what you need.
b. Fill out the template accordingly. You can either use the template as it is or modify it to meet any specific business requirement by following the steps laid out in the approval workflow components above.
Once you’re okay with your newly created approval workflow, Save it and test it. Once you’re ready to share it with your team, run your flow.
2. Build a business process flow
A business process flow provides a streamlined user experience, guiding people through a business process to a desired outcome.
Instead of constantly referring to training manuals, you can reduce or eliminate user mistakes by letting the business process flow guide your users through the process.
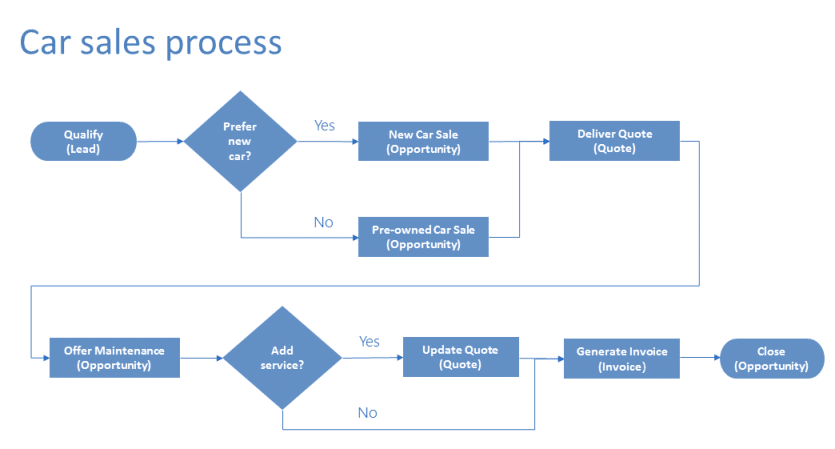
Suppose you want your customer service team to provide a consistent quality experience to your clients. In that case, you can build a business process model for how your team will manage your customer service experience.
To do this in Power Automate, go to the Solution page from the left navigation bar of your dashboard.
- Select or create a solution for your business process flow. If you are unfamiliar with solutions, check out this Overview of Solutions resource.
- Go to New > Automation > Process > Business process flow within the solution. Input your Display name and Name, choose the table for your business flow, and then click Create.
- Build your business process flow by dragging the components in the right pane into your design window:
-
-
- Add stages: how your users will progress from one business stage to the next.
- Add steps to your stages: click on the details tab of your Stage and specify the properties of your stages, such as when a column is Required to be filled before moving on to the next stage.
- Add a Condition (branch): include options between stages. For example, one condition can lead to a different stage while another leads to another outcome.
-
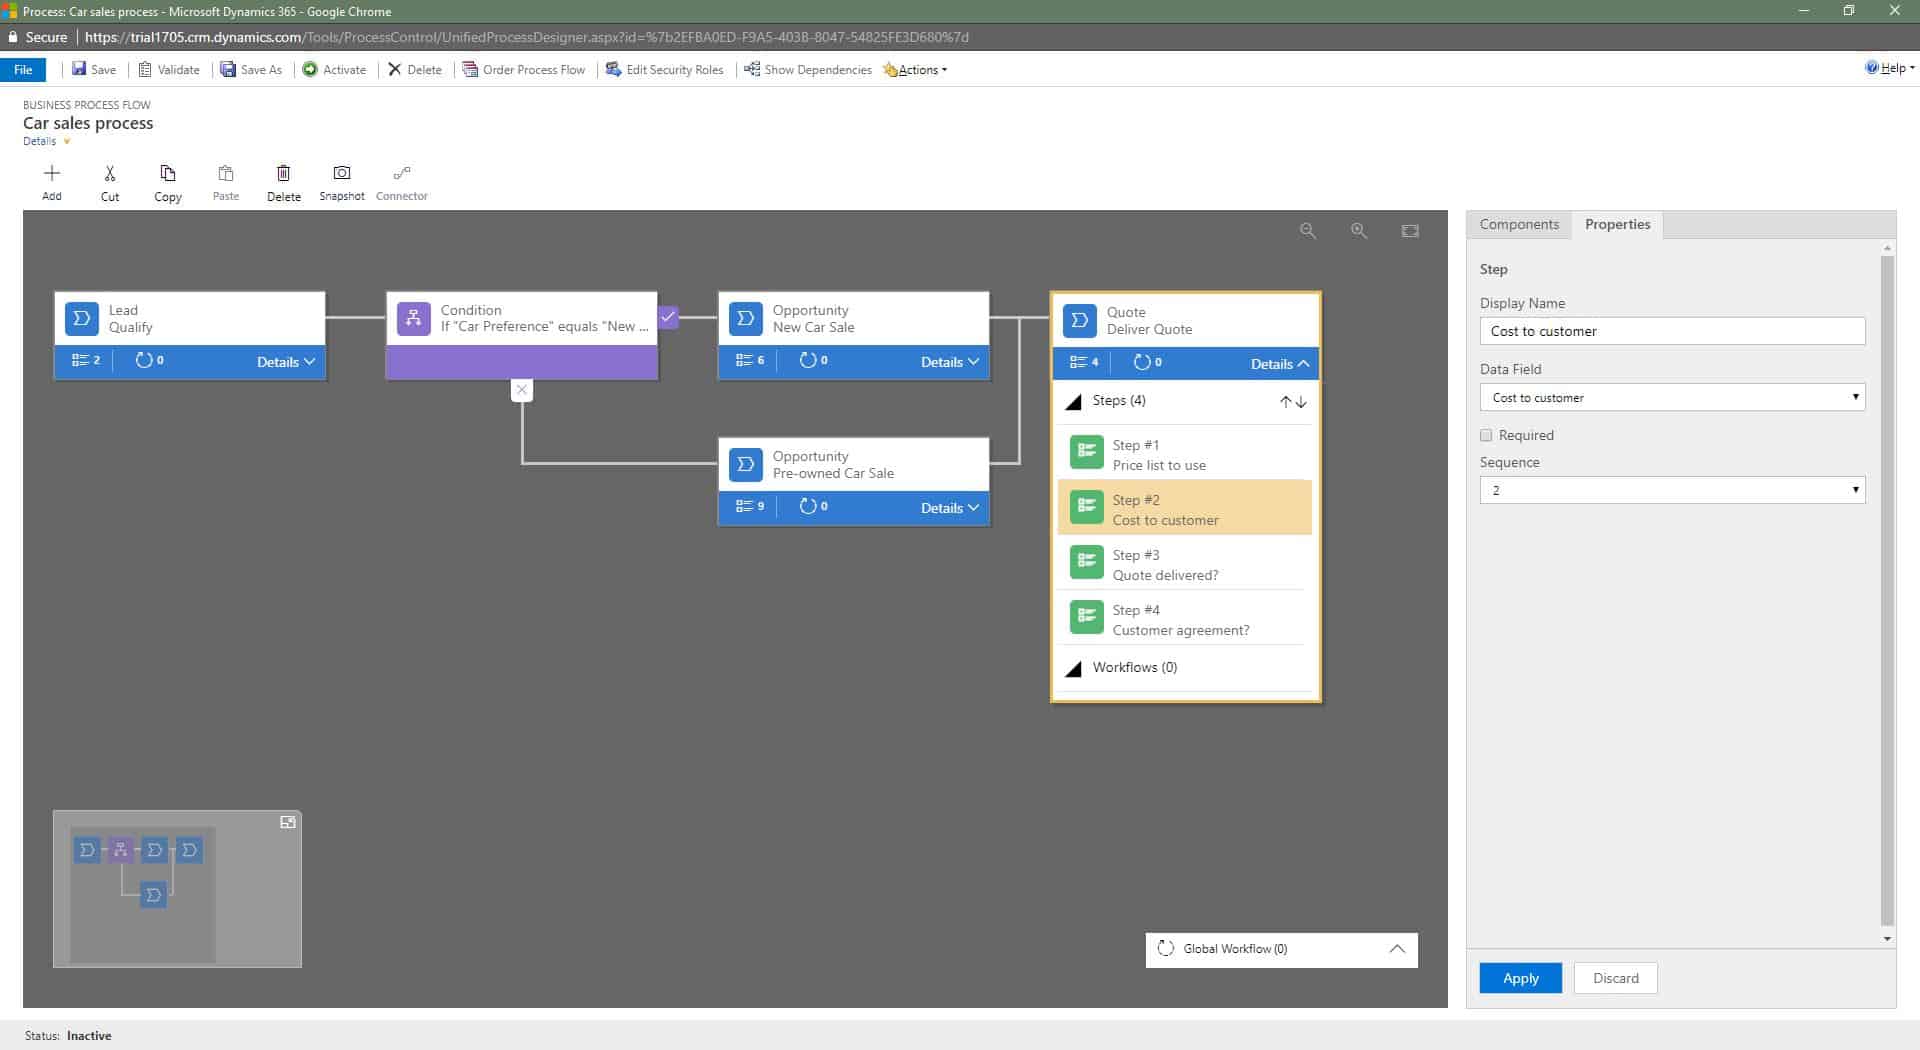
4. If necessary, add a workflow. Workflows can help you add a trigger (i.e., a notification) if the process is completed or abandoned.
5. Validate your business process flow.
6. Select Save in the action bar to save your flow as a draft. Once saved, your users won’t be able to use it yet.
7. Once you’re ready for your team to use your flow, select Activate.
After creating your business process workflow, you can control who creates, updates, or deletes your flow with the Edit Security Roles.
3. Use AI in your automated processes
With Microsoft’s new Artificial Intelligence (AI) Builder, you can integrate Microsoft AI into your automated flows to help your organization build more efficient processes to gather and process data.
You can do things such as read cards and IDs, translate audio, process receipts, and so much more. You simply have to add AI Builder to your workflows, like the ones we described above.
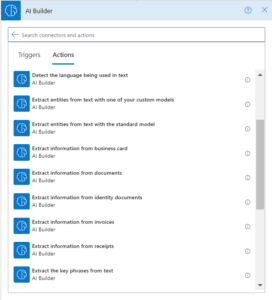
For example, if you want to add a card reader to your workflow:
- Create a New flow > Instant cloud flow. Name your flow.
- On the Choose how to trigger this flow > Manually trigger a flow, then select Create.
- Expanding your “Manually trigger a flow” pop-up, select +Add an input > File as the input type.
- Replace File Content with My image.
- Choose + New step > AI Builder, then select Extract information from business card in the list of actions.
- Specify “My image” from the trigger in the Business card input for your flow.
- Select Show advanced options and verify that “Detect automatically” is in the Image type input.
- Select Save, then Test your flow.
With these easy-to-build workflows, business processes, and AI, Power Automate is a great option for any business looking to kickstart their journey in automation. The benefits are clear: increased productivity, reduced mistakes and budgets, and improved efficiency and compliance.
Even better: this is just the beginning of what Power Automate and the entire Power Platform can do. Various capabilities in the platform are worth exploring, so be on the lookout for more exciting things Power Automate (and the rest of the Power Platform) has to offer.
Safeguard Your Power Automate with AvePoint
As you can see, Power Automate is a pretty powerful tool that can transform how your business gets work done. Moving forward, as you increase your adoption of Power Automate, you’ll want to encourage your team to build their own automated workflows to drive efficiency and productivity.
While this is the true value of business transformation with Power Platform – placing the power to solve a challenge in the hands of those who face it – you must have safeguards and data protection in place to ensure your environment stays controlled. If you allow your team to build without guardrails, it will be harder to manage and maintain things, resulting in sprawl, security concerns, and potentially even data loss.
As the industry’s first solution to support business transformation with Power Platform, AvePoint EnPower offers advanced management and governance capabilities that allow your team to take full advantage of all that Power Automate and Power Platform have to offer. With actionable monitoring capabilities and a complete lifecycle management process, AvePoint EnPower can help you maintain control of what your users are creating and using, allowing you to stay worry-free while you scale usage of Power Platform.
Stay up to date on the latest articles about what’s new in technology, SaaS Management & Governance, SaaS Backup and Data Management. Subscribe to our blog now.
Sherian Batallones is a Content Marketing Specialist at AvePoint, covering AvePoint and Microsoft solutions, including SaaS management, governance, backup, and data management. She believes organizations can scale their cloud management, collaboration, and security by finding the right digital transformation technology and partner.

