Read our other Microsoft Ignite recaps below:
- Satya Nadella’s Keynote: Business Trends & The Metaverse
- What You Need to Know About Privacy Management for Microsoft 365
- 4 New Microsoft 365 Hybrid Work Features on the Horizon
- 6 Things You Need to Know About Microsoft Teams Connect (Shared Channels)
In one of the recent Microsoft Ignite sessions, Microsoft Product Marketing Manager Eric Ouellet and Principal Program Manager Mas Libman highlighted the importance of data security and how Microsoft’s Data Loss Prevention (DLP) solution can help prevent data loss in Microsoft 365.
We know how important this discussion is in today’s work climate, so let’s go over the main points of the session and how your organization can leverage the tool for a better and safer cloud experience.
Microsoft Security and Compliance
Ensuring that sensitive data is protected is crucial for every organization, especially for industries with strict data regulations to comply with. Proactively securing business-critical data will provide immense value to your business.
With Microsoft Information Protection as the underlying pillar for all security solutions in the Microsoft suite, you can discover, classify, and protect sensitive information. This capability is being leveraged by DLP to crawl into your workspaces, look for your sensitive data, and alert you of possible exposure to help you take immediate action.
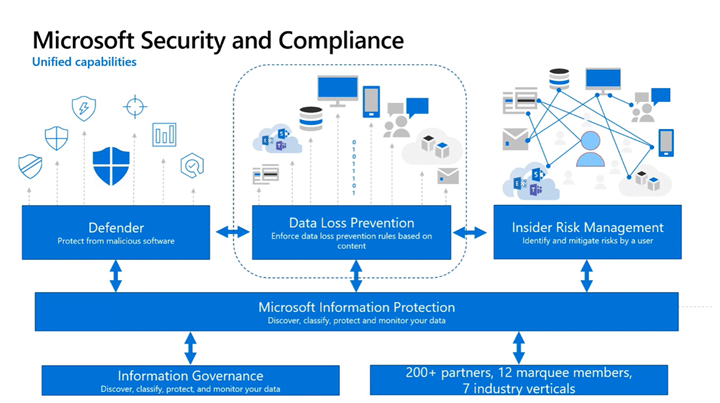
It is also used to create content flows and new workflows because of its capability to reuse information tagged to your documents and assets, which helps DLP classify your sensitive content better.
DLP is built not only as an endpoint solution, but a solution integrated with other apps both in the Microsoft environment and outside, like AvePoint’s Policies and Insights. It is thus being called the Unified DLP solution.
Data Loss Prevention
So, how exactly can DLP help protect your data? How does it differ from backup solutions?
DLP is concerned with finding sensitive information and preventing it from being overshared or maliciously modified. Third-party backup solutions like AvePoint Cloud Backup, on the other hand, can help you retain all of your data—sensitive or not—to help you restore and bounce back quickly in cases of accidental or intentional data loss.
In other words, DLP looks for and tags specific data and helps you create rules for how users should behave around that data, while Cloud Backup can help in ensuring no data is lost both by backing up your content and restoring it when it’s deleted whether by users or malware. When used together, these solutions can complement each other for a better security strategy.
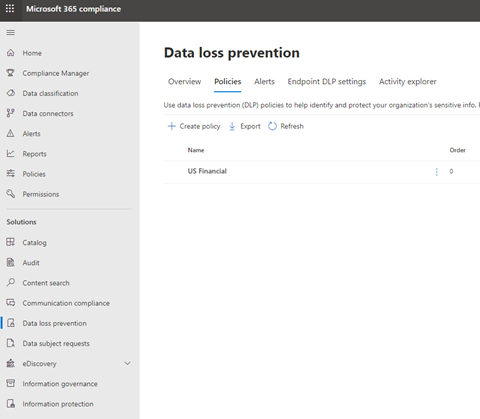
By applying a DLP policy, you can enforce rules to help you oversee what sensitive information you have, where it’s located, and how it’s being utilized by your users. A policy has rules which consist of conditions and actions that determine how your users can utilize your sensitive data:
- Monitor – If you only want to audit behavior around your content but still allow users to access
- Block – Restrict the activity completely
- Override – Restrict activity but allow users to override when certain conditions are met
What to Consider:
Before we get to creating DLP policies, let’s first go over two primary considerations for which policies you should apply and how to apply them:
1. Where do you scan for data?
To determine what data to protect, you’ll first have to identify the apps and solutions you’ll conduct your sensitive data scans on. To make things easier, DLP’s File Path Exclusions Section can help by letting you exclude specific paths from DLP monitoring.
2. What apps do you allow access to your data?
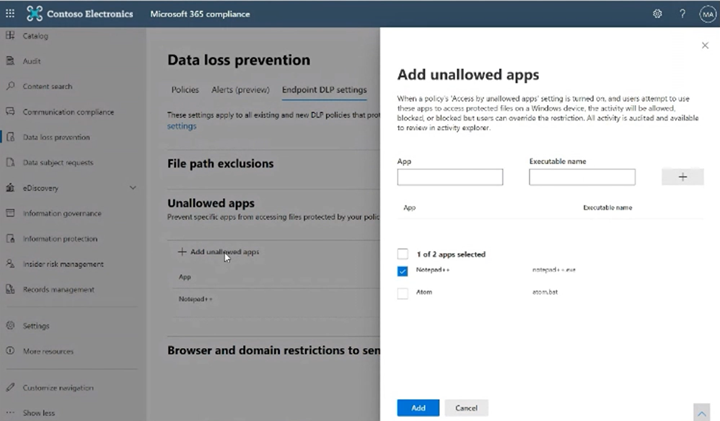
Once you find the data that you need to protect, you’ll now have to think about how to handle access. You can exclude certain apps that you don’t trust to access the data through these features:
- Add unallowed apps – Define specific applications, whether sync type or another line of business applications
- Browser and domain restrictions for sensitive data – Construct specific authorized or unauthorized browsers, service domains like Dropbox, and third-party cloud apps to prevent unwanted access, uploading, or modifications
How to Create Data Loss Prevention Policies
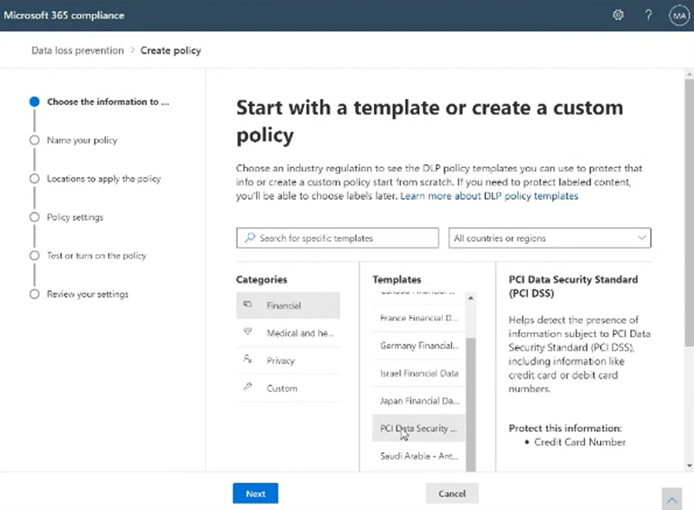
1. Start creating a new policy in the Microsoft compliance Center. Templates have a default set of information types depending on your industry and the types of data you might have that are subject to certain policies and regulations.
You can also create advanced workflows and work on the policies based on your unique requirements.
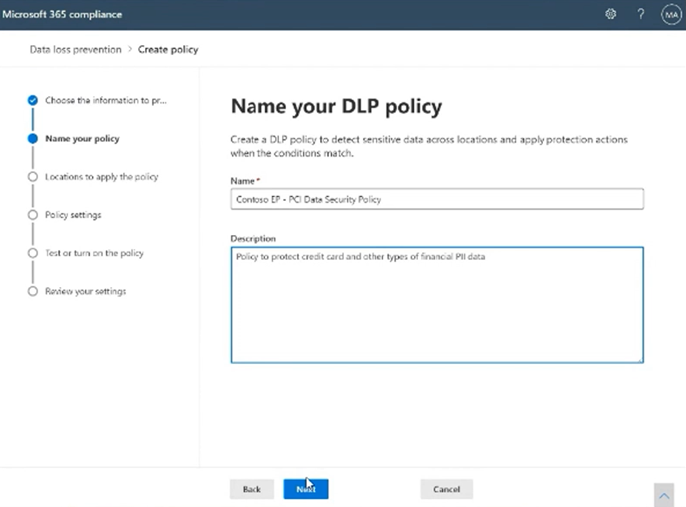
- Name your policy and add a helpful description so other teams can understand your DLP policy and its purpose.
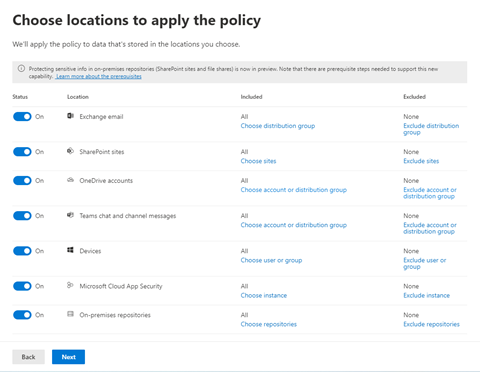
3. Specify where you’d like your DLP policies to be enforced.
You can customize and choose based on location, workload, and even users or groups.
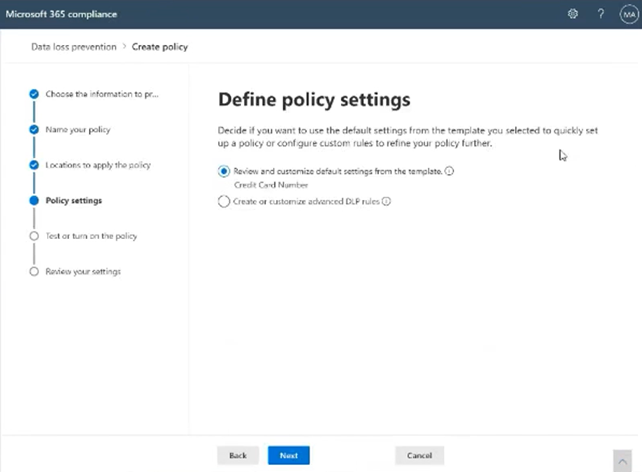
- Define your policy settings by choosing the type of content you’d like to protect. As mentioned, you can customize and enforce certain conditions and actions based on the rules you will be applying.
5. Test your policy.
You won’t want your policies to hinder your users’ workflows. To make sure your policies work the way you want them to, test it first before turning it on. This will allow you to see how it affects your users so you can modify it beforehand if necessary.
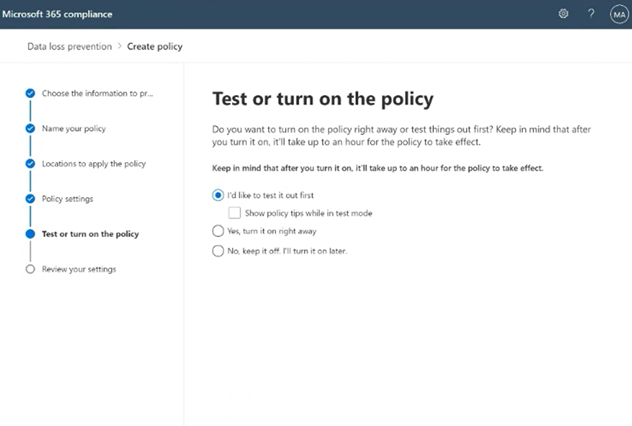
- Finally, review your settings—and then you’re done!
Hungry for more on Data Loss Prevention? Check out this interactive guide from Microsoft!

