Microsoft 365 provides a vast range of solutions and tools such as Exchange, SharePoint, OneDrive, and Microsoft Teams that bring effective communication to organizations. While they elevate the collaboration experience of employees, data loss is always a looming threat no matter which tools you use. Hence, backing up your data should always be prioritized.
Here’s what you need to know about leveraging a SharePoint recycle bin in accordance with your organization’s needs and requirements.
How does Microsoft handle your SharePoint data?
Microsoft replicates your data to different data centers so it will be readily available when unforeseen issues happen. This is also to ensure business continuity when one data center goes down. However, Microsoft doesn’t guarantee data backup; instead, they have retention policies that hold your data upon deletion. Thankfully, there are other retention features in SharePoint that allow for quick recovery when needed.
SharePoint Server
One of the ways you can restore data in SharePoint is through the Recycle Bin. However, this feature is limited and is not reliable for backing up data. This is how you can configure Recycle Bin settings of SharePoint Server 2019, 2016, 2013, and 2010.
- Open the SharePoint Central Administration app.
- Under Application Management, click Manage web applications.

- Choose the site you want to configure recycle bin settings for and then click General Settings under Manage on the ribbon.
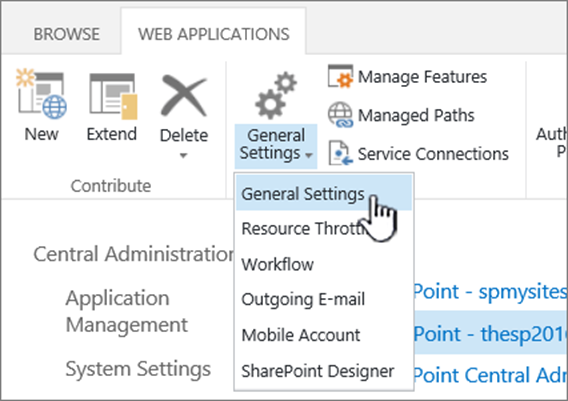
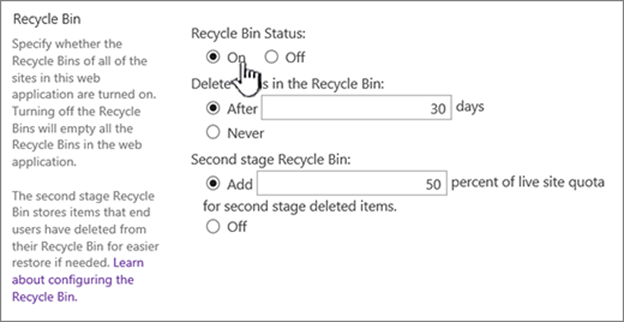
- On the Web Application General Settings page, scroll to the Recycle Bin section and you can configure the following settings:
- Turn the Recycle Bin on and off
- Set the days before the Recycle Bin empties
- Add or Disable the Second Stage Recycle Bin, then click OK to save settings.
SharePoint in Microsoft 365
Whether items are intentionally or accidentally deleted in modern SharePoint, they will be placed in the Recycle Bin that will be later available for recovery for a certain period of time. There are three types of Recycle Bins:
- First-Stage Recycle Bin: This is where an item goes when deleted from a library
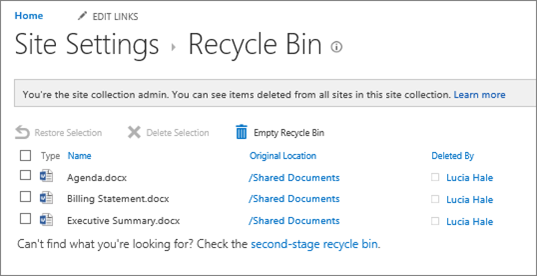
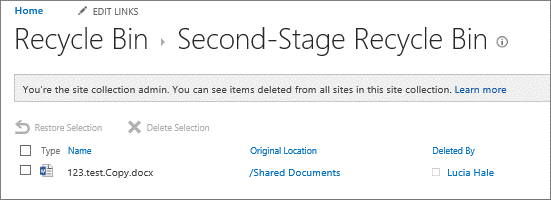
- Second-Stage Recycle Bin: When an item gets deleted from the first stage bin, it will be placed in the second stage recycle bin. The item will be retained for a maximum of 93 days before permanent deletion.
- SharePoint Online Admin Center Recycle Bin: This is completely managed by the SharePoint Online administrator. To access this page, go to https://admin.microsoft.com and sign in as a global or SharePoint admin.
Restore Your Deleted Data (SharePoint 2019, 2016, and Modern)
- On the left Quick Launch pane of the Site page, choose Recycle Bin.
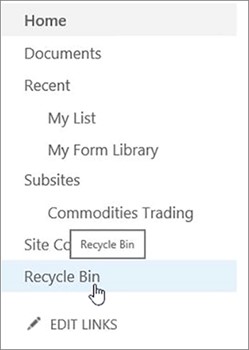
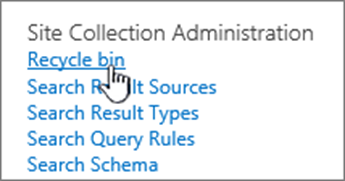
- However, if the Recycle Bin is not available, go to Settings > Site Settings > Site Collection Administration then Recycle Bin. You need to have admin permissions to proceed.
- At the bottom of the Recycle Bin page, click second-stage recycle bin.

- Click the box next to the item(s) you want to restore and then click Restore Selection.
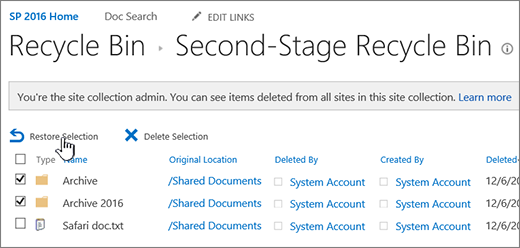
Click OK to finish. Restored items will be recovered to their original location.
Adopting Third-party Backup Solutions
While these features are great for retaining your deleted items for a certain period of time, they don’t provide comprehensive protection of your data. With AvePoint’s Cloud Backup for Microsoft 365, you can ensure that your SharePoint data is well protected and will be available for recovery at any time.
Moreover, restoring your deleted data is easy and can be done in a minute. You can also choose to restore them to either their original location or somewhere else.
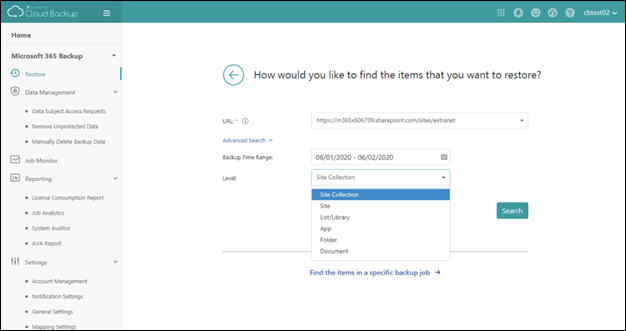
You can customize your SharePoint recycle bin, but it can’t hold your data beyond the maximum retention period. Adopting a third-party backup solution will help elevate the collaboration experience and data restoration experience of your users.

