Migrating from one tenant to another can be complicated. But while OneDrive and SharePoint migrations have become comparatively easier with the use of third-party solutions, Microsoft Teams chats migrations are still challenging.
Due to the limitations of the Teams migration APIs, many organizations rely on mailbox migration as the only option to migrate their Teams data. With the recent enhancements of the Teams migration APIs, however, there’s now an opportunity to do a direct Teams migration—but it doesn’t come without certain challenges.
Learn the ropes of a successful Teams migration with AvePoint’s Virtual Lab episode: A Masterclass in Teams Tenant-to-Tenant migration.
Teams 1:1 Chats Direct Migration Challenges
While Microsoft’s recent enhancement to enable direct Teams migration can be considered an upgrade from the Teams to Outlook mailbox migration, there are still a few challenges you need to be aware of:
- Long migration time: With various factors affecting this complex migration, the process can take a long time to complete – even months. During the migration, your Teams access and experience will be affected, so expect a lot of friction with how your users use Teams throughout the process. If you need to access Teams in the destination tenant instantly, this poses a huge setback for your organization.
- Intense throttling: Especially for large organizations, this type of migration causes unhealthy throttling, where when you reach the maximum limit for migration requests and actions in your cloud destination, it stops you from accessing your resources for a specific period. This affects not only your migration timeline negatively, but also creates multiple migration failures.
Migrate Teams 1:1 Chats with AvePoint Fly
As a migration solution expert, AvePoint found a way to use Microsoft’s Teams migration APIs to create a better Teams migration experience—a straightforward process that can help migrate as much content as you need to while keeping full fidelity of your content.
With AvePoint Fly’s new updates, we now offer migrating Teams 1:1 direct chats for tenant-to-tenant migrations! With Fly, you only need to focus on configuring these three steps:
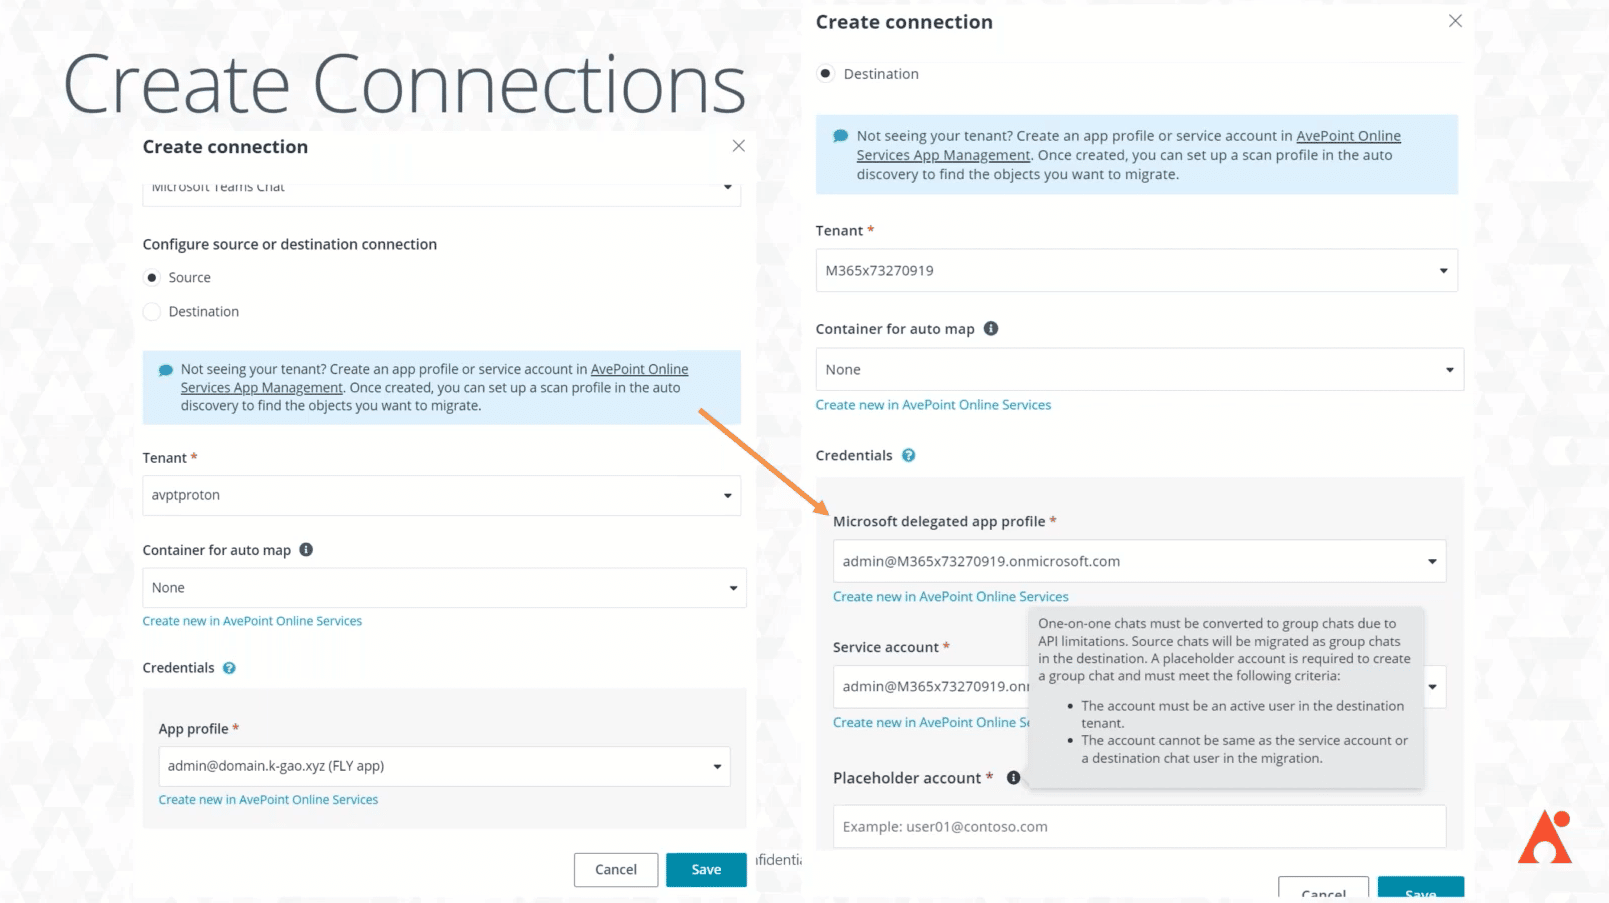
1. Create connections
This is the process where you point your source to your destination in Fly. Here, it’s crucial to use a placeholder account—usually an admin account with full permissions for your entire environment so you have the authorization to move your 1:1 chats directly into your destination Teams.

Without a placeholder account, you will be prompted to convert your 1:1 chats from your source tenant into group chats in your destination tenant, which means all your migrated chats will need a minimum of three members.
Want to see Fly in action? Check out this case study and learn how to execute your Teams-to-Teams migration with full data fidelity and minimum business disruption.
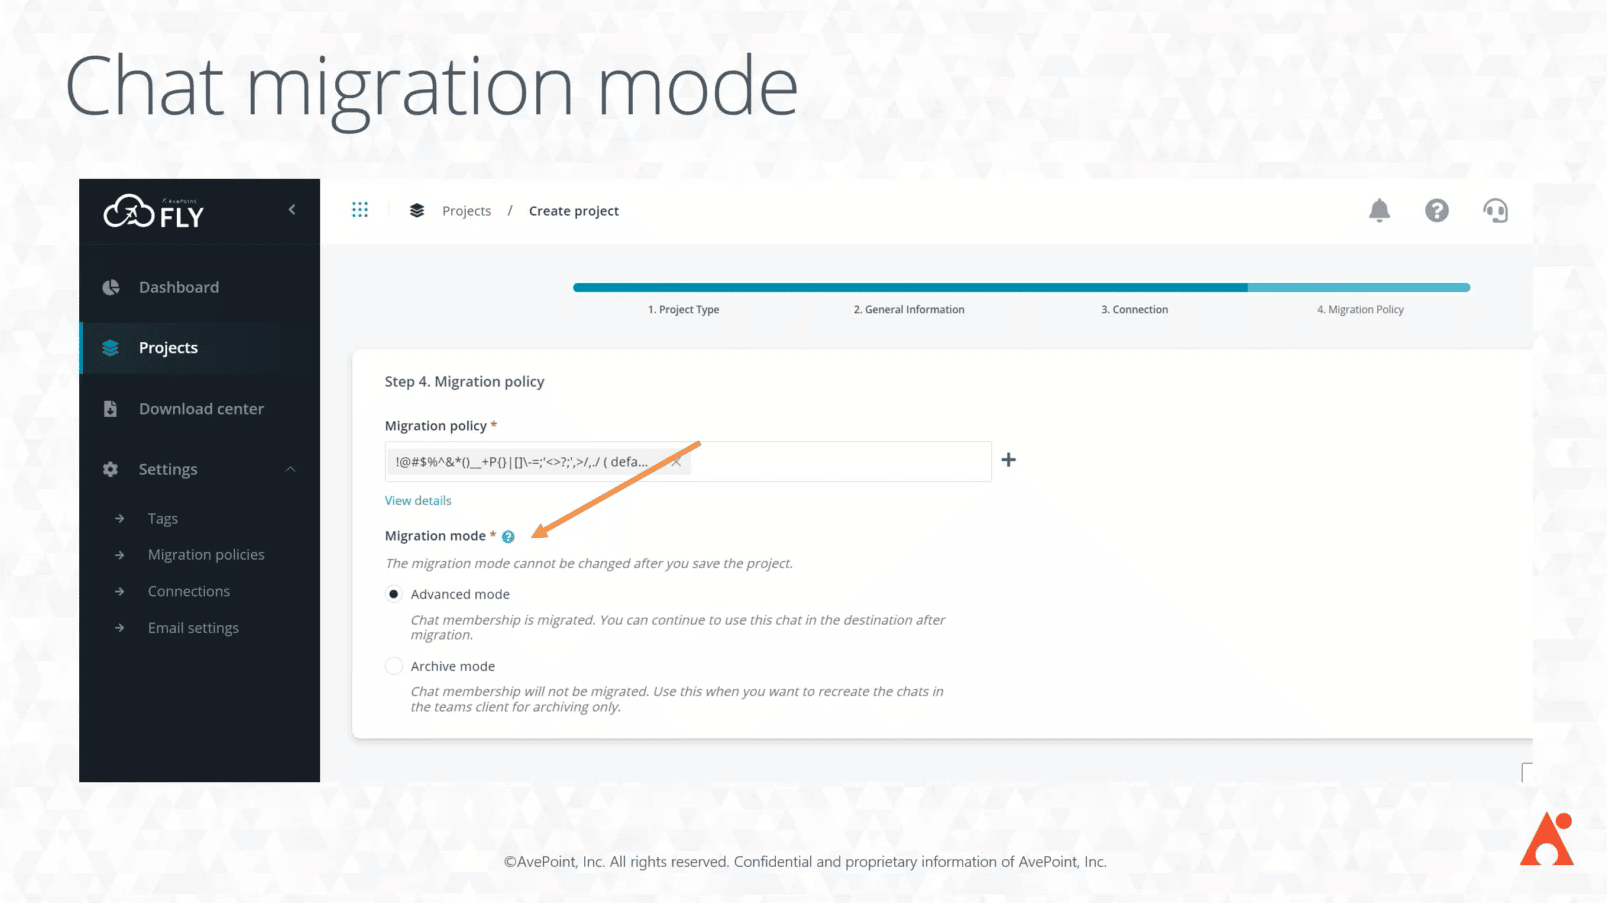
2. Choose chat migration options
As you go through your migration project, Fly gives you options for how you want Teams chats to be migrated:
- Advanced mode: Chat membership is migrated. You can use the chat in the destination after migration.
- Archival mode: Chat membership is not migrated. Use this when you want to recreate the chats in the Teams client for archiving only.

With these two options, you can choose which of your direct chats will be migrated as live, active chats and which ones will be archived in your destination tenant. The good news is, for both options, you can search through your chats after migration, allowing you full access to your chat history!
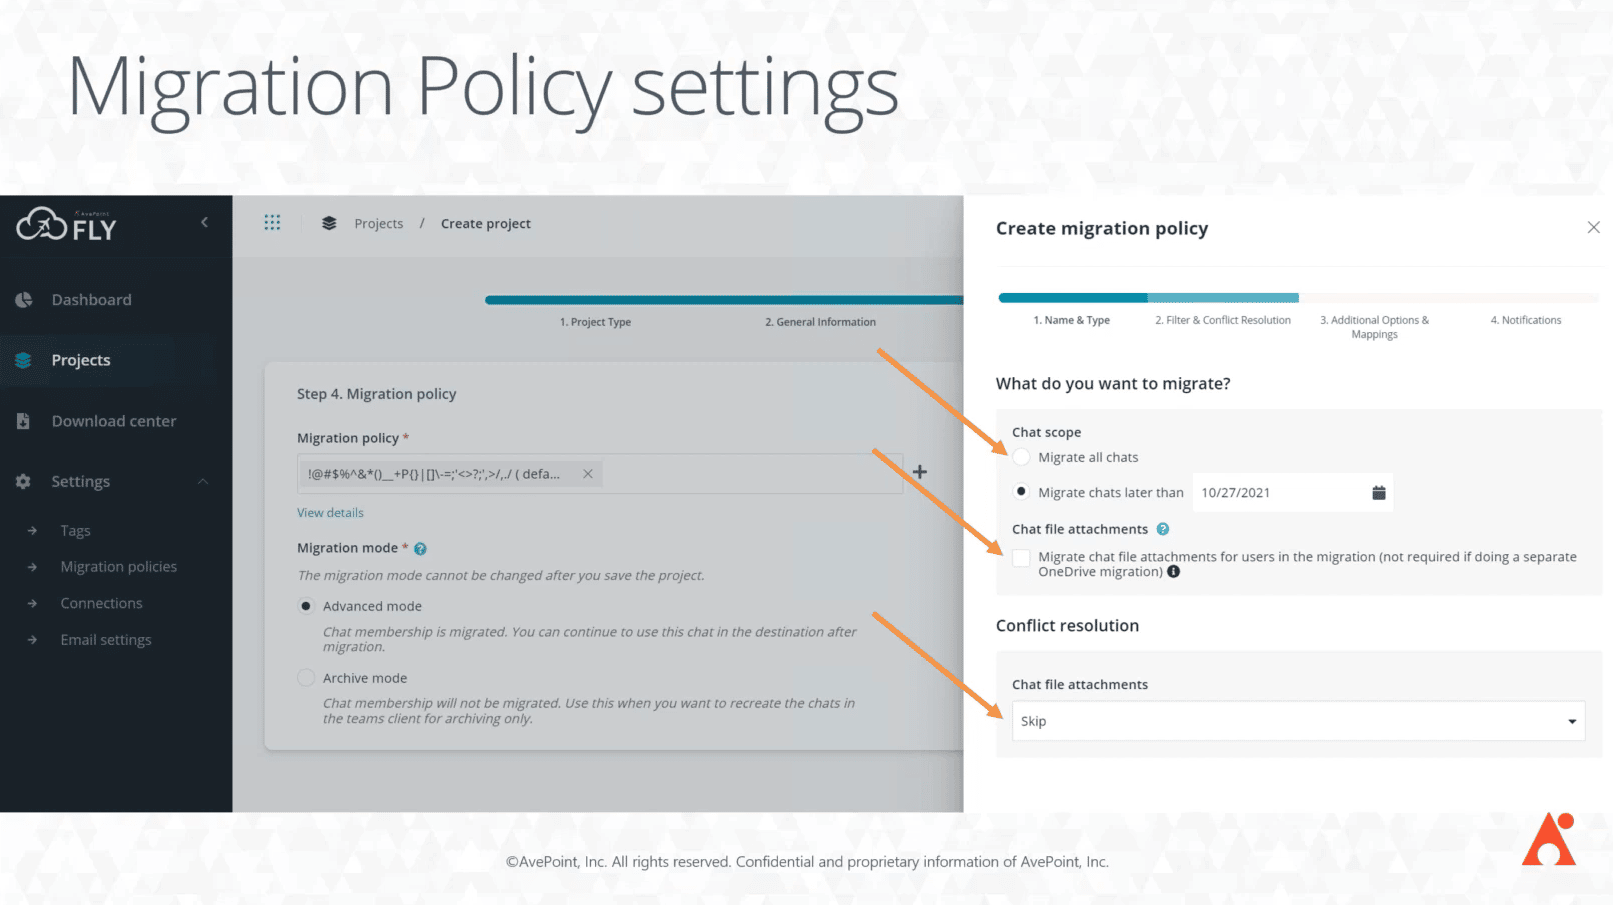
3. Configure migration policy settings
Moving forward, you can specify additional important migration settings, such as:
- Chat scope: Choose to migrate everything or you can migrate data within a particular date range.
- Chat file attachments: In a tenant-to-tenant migration, your Teams files will be migrated along with your OneDrive and SharePoint files. However, in Fly, you’ll have the option to include migrating your Teams file attachments alongside your Teams chats. That way, even though you lose the link from your Teams to OneDrive, you still have the file attachments right in your migrated Teams chat.
- Sensitivity label: You can choose to migrate the same sensitivity labels, configure new sensitivity labels in your destination, or remove the sensitivity labels altogether – allowing control and full fidelity of your migrated chats and their attachments.
- User mapping: This is an optional policy setting if you need to map a user in the source to a different user in the destination.

What to expect
While AvePoint Fly follows all of Microsoft’s best practices to make this type of migration work, there are nuances in the migration results. For example, after migration, your Teams will initially look like this:

You’ll see your placeholder account at the top, alongside the direct chat history you have with other users. But once you search for a person and directly message them, it will have the same experience as with your source Teams—but as if you’ve created a brand new conversation—and you’ll still have access to your previous conversations in your chat history.
Get a free trial of Fly!
See how Fly can work for you with a free trial. Once you sign up, you can also take advantage of all the resources available, including user guides, ebooks, webinars, and more!
For AvePoint Fly Server clients who want to access the Fly Teams migration feature, simply register on the AvePoint Account Portal or contact your Customer Success Manager/Account Manager.
Master the art of moving Teams’ direct chats for tenant-to-tenant migrations by joining the on-demand replay of our Virtual Lab webinar: A Masterclass in Teams Tenant to Tenant Migration.


